Author Archive

A History of Our Traditions

Posted on

I have to admit:  I love a good theme.

And when I say “a good theme,” I don’t mean something like…blue. Blue is a color scheme, yes. A perfectly lovely one! But it’s not a THEME. A theme is something that permeates the whole party or event, where each little touch somehow ties back to the main theme. If it’s so subtle most people won’t even pick up on it? Even better!

This is hard to do when you are party planning! But one holiday where it might be easier (in fact, you might not even realize you’re doing it) is the Fourth of July.

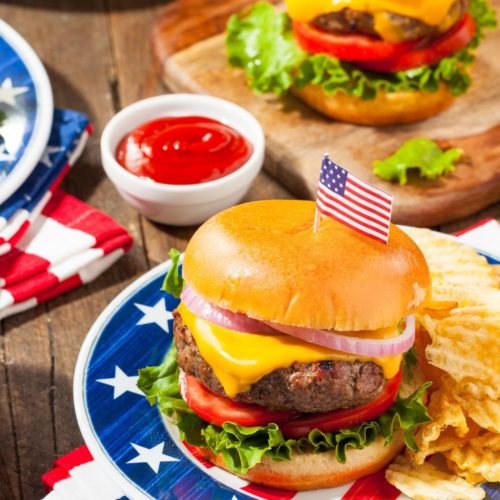
Let’s start with the color scheme. Red, white, and blue, our classic American color palette.

But why these colors? The thirteen stripes on the flag represent the thirteen original colonies, which was originally determined by the Continental Congress on June 14, 1777. While the number of stars continued to fluctuate as more states joined the Union, it was later decided that the number of stripes would remain at thirteen. The current design of the American flag, as we know it today, dates back to 1960 when Hawaii joined the Union.

But originally, the decision to use red, white, and blue in the American flag did not have a specific significance. The colors are similar to those used in the Union Jack of England, which was the flag originally flown in the thirteen colonies, so simple familiarity may have played some role in color selection. Later on, when the Great Seal of the President of the United States was being developed, both the fact that these colors had been used in the flag and the significance of the colors red, white and blue was taken into consideration and shared with Congress during the seal design presentation in 1782. White represented purity and innocence, while red represented valor and blue vigilance and justice, Charles Thomson, Secretary of the Continental Congress, explained.

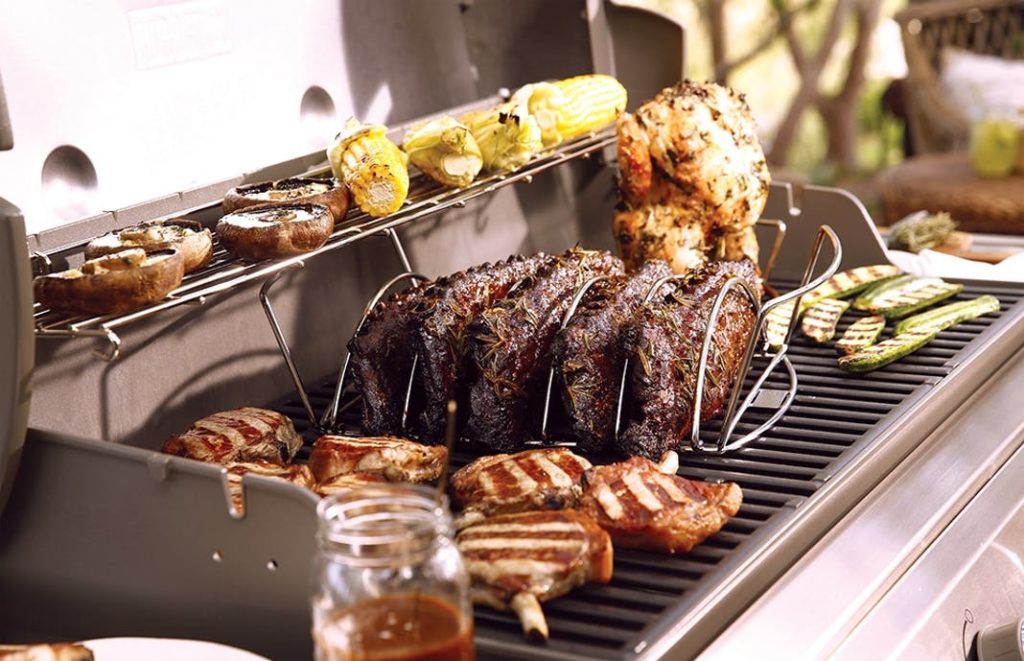
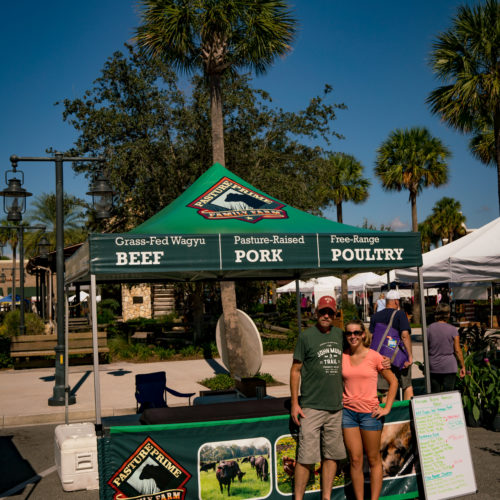
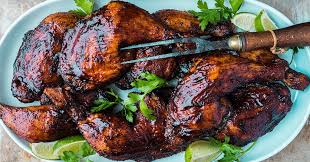
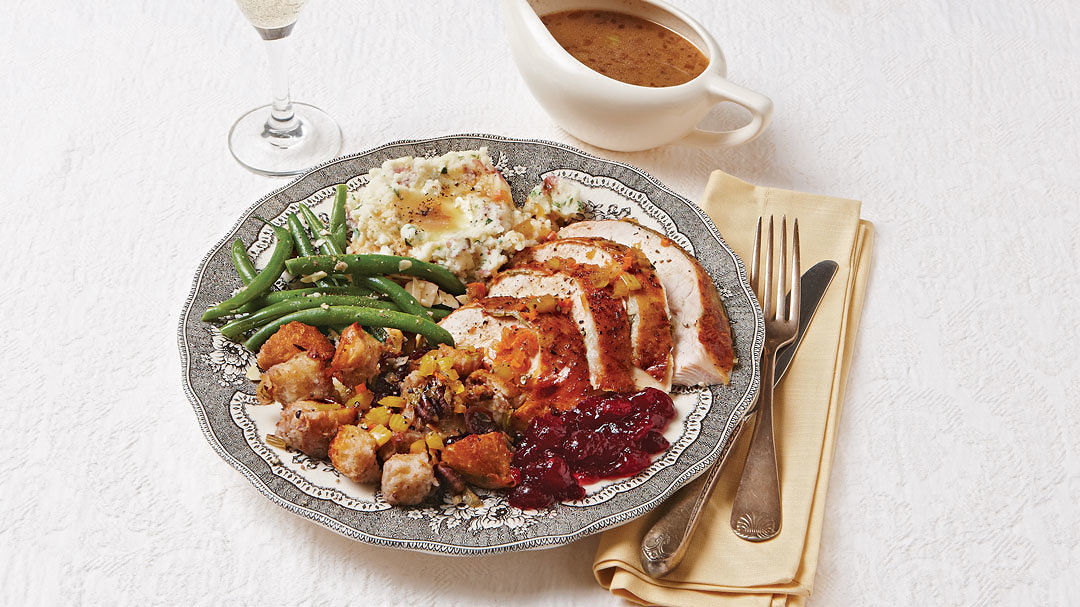
In addition to an all-American color scheme and abundance of flags, the Fourth of July usually features a barbecue or two…gazillion.

Sixty-three percent of grill-owning Americans in 2017 reported firing up the grill on the Fourth of July, making July 4th the country’s most popular barbecue date. Why do we do this? What made a BBQ the go-to option for celebrating our independence?

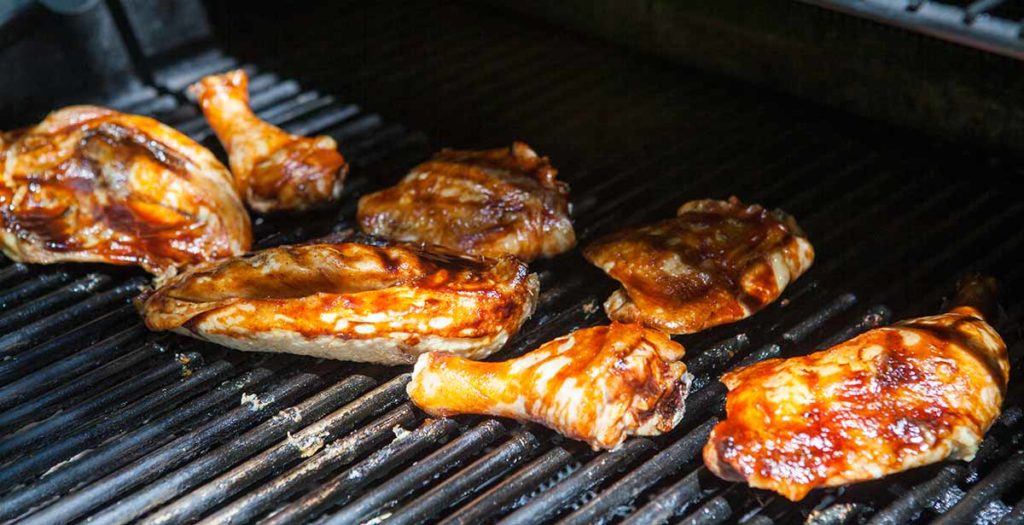
The tradition of outdoor cooking to observe Independence Day dates back to the early 1800s. In a time before a reliable, speedy postal service, never mind today’s instant access to information at our fingertips, one way for politicians to share their views and ideas was to hold a rally.

The promise of food was an added incentive to draw in the crowds. Independence Day was a popular date for these events and they became particularly prevalent in the South, where colonists in Virginia had been smoking large animals over pits during the summer months since well before the colonies declared their independence from King George III. In the 20th century, the advent of personal, household grills made holding your own barbecue feasible, and the tradition of the family-and-friends barbecues we’re all familiar with today was formed.

And why are we all cooking what we’re cooking?

While the original Independence Day barbecues featured large animals, such as whole pigs or even buffalo, today, burgers and hotdogs are the norm. In the 1800s, Germans emigrated to America and brought their favorite foods with them, among them frankfurters, wieners, and hamburgers. While the original hamburg steak was a semi-cured piece of beef that more closely resembles today’s bun-less Salisbury steak recipes (“hamburg steak” shifted to “Salisbury steak” during World War I to avoid any affiliation with Germany), today’s hamburgers are uniquely American thanks to the addition of hamburger buns, the meat grinder, and burgers’ prominent place in American culture and cuisine. Hotdogs, on the other hand, have stayed fairly similar to their original German predecessors and Americans consume 150 million (wow!) of them every Fourth of July. We’ve got all your barbecuing needs covered with our selection of grass fed hotdogs and hamburgers right here.

The minute the sun sets on the Fourth, children grab sparklers and start spinning around like little, overtired tops.

Those sparklers, of course, are little handheld cousins of real fireworks, which have been a Fourth of July tradition since 1777. The first Fourth of July fireworks displays were held that year in Pennsylvania and Boston, and by 1783, fireworks were becoming more commonly available and more widely used to light up the sky in celebration of our independence. But why do we do it at all? I mean, sure, fireworks are beautiful, but how did fireworks become so quintessential to our Fourth of July festivities? Well, we can thank John Adams for that. John wrote to his wife in 1776 that the anniversary of our independence should be “solemnized with Pomp and Parade, with Shews, Games, Sports, Guns, Bells, Bonfires and Illuminations from one End of this Continent to the other from this Time forward forever more.” Fast forward to 2019, and that’s exactly what happens. Thanks, John!

And we’ve got one more tradition to share with you today. (And if it’s not a typical one for your barbecue, maybe it should be!)

During the original Independence Day barbecues, the meal was followed by toasts. Thirteen toasts, to be exact, though once you got through the required thirteen, volunteers from the crowd were free to continue offering toasts for as long as they’d like. So raise your glass with us (thirteen times) this Fourth of July in celebration of life, liberty, and the pursuit of happiness!

Happy Independence Day!

That Sweet, Smoky Taste: BBQ Chicken

Posted on

Can you smell it?

That distinctive scent:  a hot, comforting, charcoal-tinged haze of smoke in the air and on the breeze. It’s the scent of summer. And it’s finally here!

What’s the best thing you can do with a charcoal (or gas; we don’t discriminate) grill?

The answer is two words. Two crispy, delicious, succulent words:  BBQ chicken.

There are two ways to approach barbecued chicken. The first, is to go the authentic route and smoke-roast the chicken at a low temperature. The second is to actually grill the chicken and baste it in BBQ sauce. Both are amazing! (And if barbecue chicken, in general, just isn’t your go-to, we’ve got chicken grilling alternatives all lined up.)

So let’s get to it!

Smoking  

What will you need? First item: a charcoal grill. Second item: wood chips.

Using wood chips when grilling is leveling up your flavor game. Just like with the herbs from your garden or the spices in your kitchen cabinet, you can experiment with combining different types of wood to create layers of flavor for your food. You can purchase a variety of woods, including apple, peach, oak, and mesquite. Each one has different characteristics that will infuse your food with a slightly different flavor. Check out Weber’s Wood Flavor Chart for a guide to the characteristics of each wood and some recommended meat pairings.

Soak the wood chips for approximately two hours and then spread them directly on the hot coals just before you put your chicken on the grill.

Now, just because you have some deliciously flavored smoke billowing out of the grill, that doesn’t mean you don’t need to season your chicken. Grab your favorite pre-mixed grilling rub or get creative and mix up your own! Combine the rub with a little olive oil and massage it into the chicken, including beneath the skin. Place the chicken on the grill, angle your vents so the smoke wafts all over the chicken before being drawn out, and let your chicken roast over low heat until it’s done.

One of the biggest considerations when smoking a chicken is the length of time the chicken needs to cook. It takes time and patience! An average-sized chicken will take about four hours to cook. Remember, chicken needs to cook until it has reached an internal temperature of 160-165 degrees Fahrenheit. Take the chicken’s temperature by inserting your meat thermometer into the deepest part of the chicken breast. You should check your chicken occasionally to gauge how quickly it’s cooking, but note the emphasis on “occasionally”—if you open that grill lid too often, you’re letting all the heat and smoke out which means the chicken will need to cook longer and is more likely to end up dried out.

Don’t have access to a charcoal grill and feeling sad because this sounds so delicious? Try a smoker box! (You can also use these with charcoal grills, if you prefer.) Smoker boxes are metal containers for wood chips punched with holes to let the fragrant smoke escape and infuse your food. Click here to see just one of many smoker boxers you can choose from. (*cough* Smoker boxes make great Father’s Day gifts *cough*)

Grilled and Sauced

An early version of barbecue sauce, as we know it today, can be traced to 18th century German settlers in South Carolina, and their “South Carolina mustard sauce” was a precursor to today’s versatile, varied condiment that pairs so well with poultry. Barbecue sauce styles can vary by region. Kansas City barbecue sauce (the most common type) is thick and sweet, while vinegar-based sauces are common to the Carolinas region and Texas-style barbecue sauce goes light on the tomatoes and heavy on the seasonings. Flavor isn’t the only thing to consider when choosing a barbecue sauce for grilling or marinating, however. Barbecue sauces that are thinner or higher in vinegar will penetrate the meat more easily, while the thicker Kansas City-style sauce tends to sit on the surface.

If your favorite sauce is a thicker one, consider thinning it out a little before basting. This recipe uses a technique from Adam Perry Long where the barbecue sauce is thinned with water and then repeatedly painted onto the chicken. This keeps the sauce from burning and, instead, allows it to reduce and caramelize as it cooks. This grilling method takes patience and attention, but it’s so worth it in the end.

No grill? Check out this oven-baked version. Don’t let a lack of outdoor appliances keep you from diving in to summer with some barbecued chicken this year!

Is barbecued chicken just not your thing? Never fear! Check out these grilled chicken BBQ-alternatives:

Happy grilling!

Mother’s Day Brunch

Posted on

While we don’t have scientific proof of this, we feel pretty confident making this statement: The most popular day of the year for brunch is Mother’s Day.

Brunch:  breakfast + lunch = one of our favorite meals. It’s savory, it’s sweet, it’s incredibly filling because you’re eating for TWO meals…it’s the best. And if you can also celebrate the mothers in your life while consuming alarming amounts of bacon, pastries, and perhaps a cocktail (or two)? Even better!

One of the great things about brunch is how accessible it is. You can go as simple or as extravagant as you want with the menu and it’s pretty much guaranteed to be amazing either way. And since, as non-scientifically stated, Mother’s Day is the most happenin’ brunch day of the year, your best bet may be to stay home and serve Mom a delicious, homemade meal rather than make a reservation six months in advance to get a table in at a place that’s so packed and loud you can barely hear yourselves talk (can you tell we’ve been burned by Mother’s Day brunch before?!). So we may be biased, but it’s homemade brunch all the way for us! And we’ve got suggestions to assist with your very own Mother’s Day brunch planning.

The Food

Ham:  We can’t say it enough: Ham is a host’s best friend. It can be served hot or cold and is as perfect for breakfast as it is for dinner. Try a delicious slice of our spiral sliced, honey glazed ham alongside your waffles, in a ham and cheese quiche, or as the anchor of a make-ahead breakfast casserole.

Sausage:  We love how versatile sausage is. It’s delicious on its own. And it’s equally delicious in a brunch recipe. We’ve got classic mild breakfast sausage to accompany your eggs (free range, brown, and with yolks that rival your orange juice for color). And we’ve also got andouille sausage that’ll liven up any breakfast casserole. Andouille sausage is a smoked pork sausage originally dreamed up in France and now common in Creole and other Louisiana cuisine. Try this Spicy Breakfast Casserole with Andouille Sausage to get Mom’s taste buds hopping (or substitute one of our milder sausages if Mom’s taste buds prefer a gentle shimmy over a hop).

Pastries:  One of our favorite things about brunch is that it combines sweet and savory throughout the menu. Hearty waffles topped with berries and fresh whipped cream alongside a rasher of bacon? A perfect combination of sweet and salty. Don’t forget to add a selection of pastries—or even a more traditional dessert (it’s prime rhubarb season right now—hello, strawberry rhubarb everything!) to provide the perfect capstone to the meal.

BACON:  No breakfast is complete without bacon. Mom is guaranteed to love Torm’s Secret Recipe Brown Sugar Cured Bacon. Thick sliced and amazing, you’ll have a hard time sharing. Try to remind yourself that it IS Mother’s Day, after all, and maybe let Mom have a slice or two.

The Drinks

Mimosas:  This champagne and orange juice cocktail combines the wholesome citrus notes of breakfast with the celebratory effervescence of the afternoon. A perfect companion for your brunch menu! There are approximately eighty billion variations on mimosas (again, not scientifically verified, but we’re pretty sure we’re right) on the internet so there’s a mimosa recipe out there to complement every menu. Here’s a base recipe with a few suggested variations to get you started.

Bloody Marys:  This drink has gotten so elaborate in recent years that it’s now practically its own side dish! Garnishes can include shrimp, bacon, jumbo olives, celery, pickled green beans, dill pickles…and that’s before we even get to the more standard lemon/lime wedges! There’s even a recipe for one with a cheeseburger garnish! Things are getting out of hand. But they’re so delicious, they’re hard to resist! Nutritious, too! (Well, except for the vodka, but since even that is made from potatoes, this is basically a glass of veggies.) Tomato juice is rich in Vitamins B and C and full of antioxidants, such as lycopene, which may reduce inflammation and increase heart health. You can find a Classic Bloody Mary recipe here (we like to go a little heavy on the horseradish!).

A Little Pizzazz:  If you’re looking for something extra special, this Rosé Sangria Float is perfect for Mother’s Day. A base of raspberry sorbet soaked with vodka and a bubbly rosé and topped with fresh berries really brings the “Wow!” factor.

The Special Touches

The linens:  A tablecloth is an easy way to make any meal seem a little more special. So, too, are cloth napkins. If you don’t have them or don’t want to buy them, dish towels can serve as a cute alternative. (Even cuter if you tie them with baker’s twine or a ribbon!)

The foliage:  You can never go wrong with flowers, but we’re here to tell you there’s a way you can go EVEN MORE RIGHT. Have you heard of the language of flowers? Each flower has its own meaning and message to convey to the recipient. Give Mom a bouquet or arrangement of yellow tulips and you’re telling her that there’s sunshine in her smile. And what Mom isn’t going to absolutely melt over that?! Some pointers on what to include in your bouquet or table arrangement can be found here and a massive list of flowers with their meanings can be found here. (Now if only there was a website with suggestions for more subtle conversational segues than, “LOOK HOW THOUGHTFUL I AM WITH THESE FLOWERS, MOM!”)

YOU:  We’re pretty sure 99% of moms out there would agree with us (again with the unverified statistics! We’re really on a roll today!) when we say that the most special part of any Mother’s Day brunch is going to be you—your presence, your laughter, your time…Mother’s Day is a day to celebrate the bond between you and the mothers in your life, whether they’re mothers or grandmothers, biological or of the heart, aunties or friends. Take a moment in between mixing mimosas and relax in the knowledge that Mother’s Day is really just a celebration of love.

With bacon. Bacon is an A+ way to celebrate love.

Easter Eggs

Posted on

Happy Spring!

It’s time to turn our thoughts to April showers, May flowers, and the Easter holiday that is fast approaching!

When it comes to Easter, we’ve usually focused on the delicious meals families often make to celebrate the holiday. Ham and lamb are both great choices for entertaining a crowd and we stand by that statement again this year! Unsure about the different cuts of lamb or how to prepare them? We talk about the many lamb options that lay before you right here.  And we love ham for its flexibility—it can be served hot or cold and is always a crowd-pleaser. Check out our suggestions here! But there’s one Easter staple we haven’t talked about in those blog posts: the egg.

How, exactly, did eggs come to be so enmeshed in our Easter traditions?

The practice of decorating eggs has a long history. Ancient, in fact. Dating back to approximately 5,000 years ago, people viewed the egg as a symbol of death and rebirth. In civilizations where the ruler was viewed as a god (think ancient Egypt), painted ostrich eggs were included among the other artifacts laid in the ruler’s grave or tomb. These customs may have influenced how other cultures came to view the egg and incorporate it into their own beliefs. Early Christians embraced the egg’s symbolism and began to create Easter eggs. These early Easter eggs were stained red to represent Christ’s crucifixion, and the egg itself, with its history of representing death and rebirth, came to symbolize the empty tomb of Jesus and his resurrection. The tradition of the Easter egg gradually spread to Russia and Siberia, then to Europe and beyond.

The concept of Easter eggs continued to evolve, eventually becoming an intrinsic part of our culture.

Ask anyone you meet what an Easter egg is, and even if their family traditions differ or they don’t celebrate the holiday, they’ll still know exactly what you’re talking about. But while stuffing plastic eggs with candy and small toys is fun, the REAL fun can be taking time to color eggs to use as decorations, hide for an egg hunt, or even eat as part of your Easter meal.

First things first: which eggs to use?

Historically, the classic choice is chicken eggs, though if you’re looking for a larger option, ducks produce eggs that can be around fifty percent larger than a jumbo chicken egg. People also often gravitate toward white eggs, thinking they are the best choice for decorating. But while there’s nothing wrong with starting with a blank canvas, brown eggs dye just as easily and the end results have a beautiful, earthy appearance with a nice depth of color. If you’d like to experiment with decorating brown eggs this year, you can stock up on farm fresh eggs for the holiday right here.

When it comes to decorating, you could go all out and create Pysanky eggs, which are elaborately decorated Ukrainian Easter eggs featuring symmetrical designs that have been drawn onto the eggs with the utmost precision. If you’re looking for a quick decorating job, this is not the option for you! But if you’d like to try your hand at creating some of these gorgeous eggs for yourself, Martha Stewart offers a handy beginner’s guide to Pysanky eggs.


For those of us looking for a slightly less time- and labor-intensive decorating option that still avoids those chemical-laden store-bought color tabs, natural dyes may be the way to go. This is also a great activity to do with kids—they’ll get a kick out of experimenting and learning which common kitchen items can be turned into egg dye. Even better, natural dyes can sometimes surprise you, which adds a layer of anticipation to the whole project. While you might think a red cabbage dye is going to result in a beautiful red egg, the actual end result will probably be closer to blue.

To create your own dyes, bring one quart of water and two tablespoons of white vinegar to a boil, add the ingredients for your chosen color, and let the pot simmer for thirty minutes. After the water has cooled, strain the dye and then let your eggs soak for a minimum of thirty minutes. The longer they soak, the richer the color!


Yellow

Ground turmeric—use three tablespoons. A pale yellow will appear after about thirty minutes of soaking.

Blue

Red (or purple) cabbage—use three cups of chopped cabbage. (To achieve a dark blue, the eggs will most likely need to soak overnight.)

Green

Soak the eggs in turmeric dye for thirty minutes and then in cabbage dye for five seconds.

Brown

Replace the water in the base recipe with one quart of strong black coffee and boil eggs for thirty minutes to create a gorgeous, rich brown.


This article from Good Housekeeping has more dye recipes, including silver, orange, and pink, as well as suggestions for vinegar substitutions, and we are “dyeing” to try them all! (Sorry, I’ll show myself out. Please don’t throw your eggs at me.)

We wish you a glorious start to the Spring season! And if you try your hand at Pysanky eggs, be sure to send us pictures!

“Ooo-MOM-ee”

Posted on

We all know how to describe our food, right? Chocolate is sweet. Lemons are sour. Fresh cranberries are bitter. French fries are salty. These words are part of our everyday vocabulary, and these basic tastes make up the language we use to both create our meals and recipes and talk about our food.

But did you know there is a fifth taste?

It’s true! Umami (pronounced ooo-MOM-ee) is the word for that flavor we’ve always been able to taste but have never been able to quite describe. Umami is, according to the Umami Information Center, “a pleasant savory taste imparted by glutamate, a type of amino acid, and ribonucleotides, includes inosinate and guanylate, which occur naturally in many foods including meat, fish, vegetables and dairy products.” Umami, in short, is the taste of protein. And it’s delicious.

Umami is a Japanese word (it stems from the word “umai,” which means delicious), but it’s a taste beloved worldwide. This map of traditional, umami-rich foods from around the world demonstrates that umami is a taste sought by every culture, from seafood-based sources in Asia to Hungarian-style kielbasa and aged cheeses in Europe to some downhome BBQ sauce and gravy in the U.S. One of the most commonly enjoyed sources of umami around the world is actually tomatoes. Think about how many variations there are on the tomatoes from your backyard garden—marinara sauce, ketchup, a slice on your hamburger, mole sauce…the list goes on. Tomatoes are a cooking staple in part because they are such an amazing source of umami.

Okay, so pretty much everyone loves umami. Why, though?

Well, it comes down to biology. Humans are drawn toward things that are necessary to our survival. Protein is one of those things, and if you’re tasting umami, it means you are consuming the protein your body needs to function. Umami is actually more than just a taste, though. Umami helps satisfy your appetite, which in turn, helps control portion size. It also decreases the need for salt in your food. Umami enhances salt’s flavor so you don’t need to use as much to achieve the same result.

How can you tell how much umami you might get from a given food? Umami can be measured by the level of free glutamatic acid in the food. Aged cheddar cheese has an umami level of 78 mg/100g. Parmesan cheese, on the other hand, is one of the most umami-rich foods around with a level of 1,680! There are many foods that contain umami and you can use your taste buds to guide you toward your favorite combinations or check out this chart for the specific levels.

You may be wondering why, if umami is such an essential part of cuisine, you haven’t heard of it before. Umami is a taste humans have craved for thousands of years, and the term “umami” was coined back in 1908 by a chemist named Kikunae Ikeda (who went on to patent MSG). However, umami has only recently been recognized by western scientists—the existence of taste receptors on our tongues for umami, in addition to the four basic tastes of sweet, sour, bitter, and salty, was just confirmed in 2009.


Science has also shown that the math behind umami’s flavor isn’t as simple as 1+1=2. Instead, when ingredients with umami-providing compounds are combined (like beef and cheese), the ingredients enhance each other and increase the umami exponentially, creating flavorful, crave-worthy dishes. You may already be maximizing your meals’ umami potential without even realizing it. Bacon on a hamburger? Parmesan on top of your tomato sauce and pasta? Peak umami. But if you’re looking to deliberately try for that delicious umami taste, there are a ton of options you can try out—and most of the ingredients are probably already in your kitchen.

  • A dash of fish sauce (made from fermented fish and packed with umami) will give a dish an added layer of flavor
  • Try boiling your potatoes in chicken broth rather than water
  • Add red wine to soups or stews
  • Pair beef with mushrooms or mushroom sauce
  • Add this brown sugar cured Berkshire bacon to literally everything
  • Toss some cooked shrimp into your salad

In the mood for a foolproof umami recipe rather than some umami flavor experimentation? There are a ton of umami-rich recipes to choose from, and the recent emphasis on umami and all its glory means a quick Google search will bring up galleries of umami-laden recipes. As you browse, you’ll probably notice that a lot of the recipes are classic comfort foods—just another sign that we all love and instinctively seek out umami!

Here a few highlights from Eating Well’s umami gallery:

Want to try something a little more unusual? Try this Japanese Beef Stew recipe. It’s packed with umami and features beef chuck roast, which you can stock up on right here.

Whatever flavor you’re craving today—be it sweet, sour, bitter, salty, or umami—we wish you a day of delicious, satisfying meals.


Enjoy!

Chicken Thighs with Creamy Mustard Sauce

Posted on


Chicken Thighs with Creamy Mustard Sauce

A rich flavorful sauce takes Pasture Primes juicy, NON GMO chicken thighs to a new level.

Course Main Course
Keyword Chicken Thighs
Prep Time 10 minutes
Cook Time 30 minutes
Total Time 40 minutes
Servings 4
Author Adapted from Ina Garten

Ingredients

  • 8 mdeium Bone-in Chicken Thighs (2 1/4 pounds approx.)
  • Kosher Salt
  • Ground Black Pepper
  • 2 Cups thinly sliced onion
  • 2 TBSP dry white wine
  • 8 ounces creme fraiche (or sour cream)
  • 1 TBSP Dijon mustard
  • 1 TBSP whole-grain mustard
  • 1 TBSP chopped fresh parsley

Instructions

  1. Pat chicken thighs dry with paper towels and set skin side up on cutting board.

    Sprinkle thighs with 1 1/2 teaspoons salt & 3/4 teaspoons pepper on both top & bottom sides.

    Heat 1 TBSP olive oil in large cast iron skillet over medium heat.

    When oil is hot, place thighs skin side down in one layer 

    Cook for about 15 minutes without moving, until skin is golden brown. (If skin is getting too brown, reduce temperature)

    Turn chicken with tongs and add onions to pan, including under the chicken.

    Cook over medium heat for another 15 minutes, stirring the onions occasionally until the temperature of the thighs reaches 155-160 degrees and onions are browned.

    Transfer chicken (not the onions) to a plate to rest, while making the sauce.

    If onions aren't browned, cook them for another minute or so.

    Add wine, creme fraiche, Dijon mustard, whole-grain mustard & 1 teaspoon salt and stir over medium heat for 1 minute.

    Return chicken to pan, skin side up along with any juices, sprinkle with parsley and serve hot.


*From Ina Garten

It’s Going to Be an Amazing Year

Posted on

Some of our best friends are Pigs. Not the rolling-around-in-the-mud kind (but, okay, yes, we love those, too) or the always-has-Doritos-crumbs-on-their-shirt-even-when-they-haven’t-even-been-eating-Doritos kind, but the Chinese zodiac kind.

In this case, “pigs” refers to those who were born during a Chinese zodiac Year of the Pig. The Chinese zodiac goes through a twelve year cycle, and each year is affiliated with one animal and their attributes. Horoscope animals include the rat, ox, tiger, rabbit, dragon, snake, horse, goat, monkey, rooster, dog, and last, but certainly not least—the pig. Not sure what your Chinese zodiac sign is? Go here, enter your birthday, and discover a whole new world of horoscope predictions.

What can Pigs, both famous and non-famous, expect from the year ahead?

Let’s start with some general Pig characteristics. Pigs are beautiful souls. They are generous, compassionate, and generally blessed with good fortune. Female Pigs are very social. They’re easygoing, trustworthy, and love a good party. Male Pigs tend to be very focused and goal-oriented, and while they may not be as social as their female counterparts or some of the other signs, they are kind, well-respected, and have loyal friends. However, this is not a LUCKY year for pigs.

Pigs have a lot of energy and should remember to take time to relax this year. Also, avoid the casino. This is not your year to play the slots, my friend. But maybe consider buying a lottery ticket? Lucky numbers for Pigs this year include 2, 5, and 8, and southeast and east are both auspicious directions for Pigs. So I’m not saying if you live in Florida, you HAVE to buy a lottery ticket this year…I’m just saying you can’t win if you don’t play.

Attending parties, such as weddings and family gatherings, will help attract good luck to you.

Happy events can also help ward off negative energy and bad luck, so any chance you have to get your party on—take it! Hosting a party? Try grilling up these amazingly juicy chops. And this party advice goes for everyone, not just Pigs. Spending time amongst family and friends is always a good choice.

While 2019 is well underway, the Chinese New Year is right on the horizon; the Year of the Pig officially starts February 5. Not sure how to celebrate? Try making pork dumplings. Chinese dumplings are a traditional choice for Chinese New Year’s Eve and are considered a lucky food. They’re also really fun to make. A quick Google search will yield tons of recipes to choose from, in varying levels of difficulty, but we happen to be partial to this one from Epicurious. Folding dumplings not your thing? Try these Asian Pork Meatballs from the Food Network. Both of these recipes call for ground pork, and you can order antibiotic-free, heritage breed ground pork right here.

However you choose to celebrate, we wish you all the luck and good fortune you can imagine in the year ahead. Cheers to a New Year! And welcome, Year of the Pig!

20% OFF SALE!! SAUSAGE SAMPLER ASSORTMENT

Posted on

NOW on SALE! 4-1 LB. of our 4 of our ”customer favorite sausages.” The Price on This COMBO can’t be beat! Taste them all and find your favorite!!

Pork Tenderloin – Everything Crusted

Posted on


Pork Tenderloin - Everything Crusted

You can put together the "bagel seasoning" at home, or try one available from Trader Joe's. A garlicky brown-butter sauce takes this dish "over the top."

Course Main Dish
Cuisine American
Keyword Berkshire Pork Tenderloin
Prep Time 10 minutes
Cook Time 25 minutes
Resting 10 minutes
Total Time 35 minutes
Servings 4
Author Adapted from Fine Cooking

Ingredients

  • 1 TBSP garlic - granulated
  • 1 TBSP` dried minced onion
  • 1 TBSP poppyseeds
  • 1 TBSP sesame seeds - toasted
  • 1 tsp coarse sea salt
  • 3 TBSP Honey Dijon Mustard
  • 2 small Pork Tenderloins - 2-2 1/4 lbs. total
  • 2 OZ Unsalted Butter - 4 TBSP
  • 1/4 cup garlic - finely chopped
  • 1/4 cup shallots - finely chopped
  • 2 cups chicken stock - LOW SODIUM
  • 2 cups dry white wine
  • 2 TBSP sherry vinegar
  • 1/2 cup heavy cream
  • 1 TBSP parsley - finely chopped

Instructions

  1. 1. Heat oven to 400 F and position rack in center of oven.

    2. Place flat rack in a roasting pan

    3. If mixing your own seasoning mix, place first 5 ingredients in small bowl.

    4. Spread mustard over the tenderloins

    5. Using wax paper, sprinkle half the seasoning mix on large sheet and roll one tenderloin in it, pressing to cover completely, then transfer to roasting pan.

    6. Repeat with remaining seasoning and second tenderloin

    7. Roast until pork reaches internal temperature of 135 F, 20-25 minutes

    8. Remove from oven and heat the broiler to medium.

    9. Broil the tenderloin, rotating the pan until tenderloins are browned in spots, 2-3 minutes

    10. Move to cutting board to rest

    11. Meanwhile, melt the butter over medium heat in a medium skillet.  

    12. Add the chopped garlic and shallots and cook, stirring until butter has browned, 2-3 minutes and do not let the garlic burn over too high a heat

    13. Whisk in stock, wine and vinegar, bring to boil & cook till reduced to about 2 cups, 8-10 minutes.

    14. Whisk in cream, salt & pepper to taste and simmer until thickened.

    15. Stir in the parsley, slice the pork, serve and SAVOR!


Raising Future Farmers, One Lamb at a Time

Posted on

With the holiday season at an end, it can be easy to fall into a bit of a rut while we wait for Spring to come. But while we may be in the depths of winter right now, there is something glorious on the horizon to look forward to, and that something is LAMB.

Sheep were among the first animals to be domesticated by humans and have been a source of food, clothing, and shelter for thousands of years. Milk, mutton, and lamb provided nourishment. Wool provided clothing and currency for trading. And skins provided warm shelter and safety from the elements.

Along with the domestication of sheep came the need for a shepherd. Large flocks of sheep needed to be rotated amongst different pastures and protected from predators. This was too much of a hardship for the average farmer to manage in addition to all their other duties, so shepherding, one of the world’s oldest occupations, was born. In some societies (or for smaller flocks), each family would designate a family member as shepherd. This person was often a child or teenager.


This tradition continues today through organizations such as 4-H, and the Southeastern Youth Fair in Ocala, Florida showcases this through their Lamb Project. Local 4-H kids have the opportunity to enter their market lamb into competition, demonstrating the care and skill with which they’ve raised their lamb to the judges. Unlike larger livestock projects that require additional adult supervision and guidance, these future farmers are able to completely manage the project themselves. It’s a wonderful demonstration of their skills and dedication. If you’re interested in seeing this for yourself, this year’s fair and competition will be held February 15-23.

We’ll definitely be there! Pasture Prime is committed to providing you with the highest quality, sustainably-sourced, locally grown food. Our lamb is no exception. 4-H Club kids raise all of the lambs we purchase, making sure they are well-fed, groomed, and exercised until they are sold. Not only do we get to purchase a lamb that we know has been ethically raised, but we are also able to support and encourage these kids’ efforts to learn by doing. They are gaining valuable hands-on experience, being provided with youth leadership opportunities, and will be a part of the next generation of agricultural innovators. We love everything about this.

Once the lambs are purchased by Pasture Prime, they are processed locally and can be cut and prepared to your exact specifications. We offer both half and whole lamb options, so you’ll end up with a beautiful variety of cuts. Lambs must be ordered in advance (by the end of February, which will be here quicker than you think!), so click here to reserve yours now.

Not sure what cuts you should request? Here’s a quick list of possibilities, but feel free to contact us with any questions! We’re happy to help you figure out how to enjoy your lamb to the fullest!

Okay, let’s do this by sections:

Ribs

  • Rack of lamb is both impressive and delicious, and surprisingly easy to prepare at home. Check out this video to learn how. Consider a trimmed rack, a crown of lamb, or a guard of honor for this cut.
  • Lamb spareribs are a delicious alternative to pork, and you can roast them, grill them, or toss them in your slow cooker.


Loin

  • Loin chops are usually 3-4 ounces and are a lean and tender choice. This is the option you probably see most commonly in the supermarket.
  • Tenderloin (also known as lamb filet—like filet mignon, but with lamb instead of beef) is incredibly tender. Great for a special occasion!

Leg

  • One option here is to go for the whole leg. This makes a great roast! You can request this either bone-in or boneless, and bone-in makes for a beautiful table presentation if you’re thinking ahead to the Easter holiday menu.
  • Sirloin chops also come from the leg region, which means they tend to be a larger chop option and there’s a small crosscut section of leg bone within each one.
  • Lamb shanks are the lower part of either the fore or hind leg and are perfect for slow cooking.
  • Kebabs are another great option for leg meat.

Shoulder

  • Our shoulders work hard and a sheep’s shoulders are no exception! A lamb shoulder can really benefit from long, slow cooking to tenderize the meat and bring out its flavor.
  • That doesn’t mean slow cooking is your only option, though! Shoulder chops (these can also be referred to as arm or blade chops) require less cooking time than other cuts. Overall, the best flavor from the shoulder will come from being cooked on the bone so you’re good either way!

We’re so excited to bring you market lambs again this year. These lambs are of the highest quality and have been cared for by the kids who will be our country’s future farmers. Reserve your lamb today —your meals will be seasoned with the satisfaction of knowing you are eating both ethically and sustainably, as well as supporting youth development in agriculture. And what could be sweeter tasting than that?

Let’s Kick Things Up This Year

Posted on

Tradition.

It’s a word that looms large in many families. Cries of, “But what do you mean you added HERBS to the mashed potatoes?” can echo through the halls at the merest hint that something about the holidays Might Change.

But you know what?

This year, we say to those fervent traditionalists: We’re doing things a new way. (And, to you, we say buy some earplugs because those traditionalists will be dragged toward a new food horizon, kicking and screaming all the way, and you only get one set of eardrums, so you want to take care of them, you know?)

So. What does that new way look like?

Well, that’s the beauty of it: you are free to do A-N-Y-T-H-I-N-G you want for your holiday main course. In honor of this occasion, we rewrote a little Dr. Seuss (from the classic, Oh! The Places You’ll Go!) for you—feel free to recite it to any stubborn family members who give you a hard time about New Recipes:

I have brains in my head.

I have feet in my shoes.

I can steer myself

Toward any recipe I choose.

I’m on my own

When it comes to prepping this meat.

And I am the one who’ll decide what we eat!

That’s right! YOU are the holiday food decision maker here! If you want to kick things up, then things will be kicked straight into Flavor Town! So let’s talk options.

First up, we’ve got some suggestions on ways to make turkey seem fresh and interesting this holiday season, especially on the heels of just enjoying it for Thanksgiving. First, though, you may want to check out these tips on selecting your turkey. All those different labels (fresh, frozen, self-basting, deep-chilled…) can be confusing!

Once you have your turkey selected, it’s time to think outside the box as far as preparation.

How about a turkey that’s basted IN CHAMPAGNE?Doesn’t that sound decadent? This recipe promises crisp skin, juicy meat, and a light flavor, and if champagne straight from France is outside your budget, any dry sparkling white wine can be substituted. Find the Champagne-Basted Turkey recipe from Fine Cooking here. Champagne too fancy for you? How about a beer-braised turkey? This recipe combines a healthy portion of stout beer with dark brown sugar and molasses to make a brine that will have you salivating.

So those are some different flavors to incorporate into your meal. Now how about some unique preparation options?

This Smoked Beer-Can Turkey recipe definitely fits that description! Brined and then rubbed in spices, this turkey has a smoky taste that you’ll love. If you decide to go this route, just keep in mind the number of people you are serving and the size of the bird you’ll need.

This recipe is designed for a 12-14 pound turkey, which can comfortably serve 8-10 people. If you’re expecting a larger crowd, this method of preparation plus trying to arrange a huge, 25 pound turkey vertically inside your grill might not be compatible. In which case, you may want to break out your big giant fryer and try deep-frying your turkey!

One of the major benefits of deep-frying (in addition to that crackling skin) is that the turkey cooks FAST. No getting up at 5am to put the turkey in the oven if you go with this option! This Louisiana-Style Deep-Fried Turkey recipe from Fine Cooking has a small ingredients list but promises big flavor.

Turkey is certainly a classic holiday meat choice, but there are plenty of other meats you can get snazzy with this holiday season. If a whole beef tenderloin sounds more like your cup of tea (or, more accurately, your cut of meat), try adding a coffee crust.

This recipe from Better Homes and Gardens also suggests ways to vary the recipe to reflect your own tastes (or, you know, to help you through that moment when you KNOW you had garlic powder in the cupboard yesterday, but now, the moment that you NEED IT, it has DISAPPEARED).

Planning to go with the Hostess’s Best Friend option?

(That is what I call ham. Because it is a hostess’s be
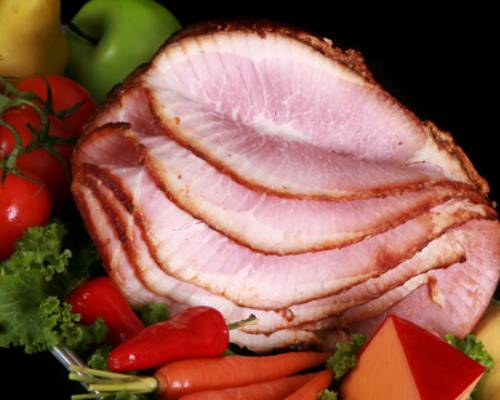
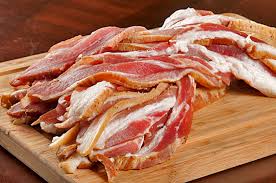
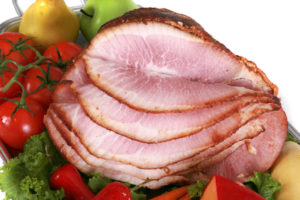
st friend. Often pre-cooked and able to be served hot or cold, ham is perfect for stress-free feeding of a big crowd.)

Try adding unique condiments or an out of the ordinary glaze to spice things up. Spiral-slicing makes this meal option even easier—check out our spiral-sliced Applewood Smoked Ham with a Honey Glaze here.

Want to get really fancy?

Try a Berkshire Pork French Rack Roast. This cut of meat may be kicked up enough for you and your family all on its own this year, so we’ve got two methods of preparation for you.

First, a simple way to make this is to use a dry rub (any flavors that strike your fancy!) with a reverse sear method of preparation. Reverse searing cooks the meat on a low temperature to get all the way to the center without any risk of overcooking the outer layers of meat. Here’s a how-to for that option.

Want to get even fancier? This recipe from Epicurious calls for juniper berries, Turkish bay leaves, a mortar and pestle, and five days of brining! This recipe may be a bit on the, shall we say, high-maintenance side, but who are we to stand in the way of your ambitions so you can find the recipe here.

With all these options, the toughest decision you’ll have to make this holiday season is deciding which recipe to go with. But once you make that decision, you’ll get to bask in the glory of everyone LOVING your kicked up holiday main course. And then you can look forward to enjoying a whole year of telling those traditionalists, “I told you so.”

Do you have a kicked up holiday recipe that’s a little untraditional? We want to hear about it! Share your recipes with us in the comments section below.

INTRODUCTORY SALE!! PORK TENDERLOIN

Posted on

INTRO ONLY 33% OFF Flavorful, and quick cooking heritage Berkshire Pork Tenderloin. This is the MOST TENDER cut on the hog. These normally sell for $25-$30 per pound, but we are introducing these now 2 Lbs. – 2 Tenderloins

Rice Noodle Bowl with Pork and Scallions

Posted on


Rice Noodle Bowl with Pork and Scallions

The sauce mixture not only adds flavor to the meat during cooking, but also doubles as a vinaigrette for the noodles.

Author Cook's Country - Apr/May 2017

Ingredients

  • 5 oz rice vermicelli
  • 5 Tbsp soy sauce
  • 3 Tbsp toasted sesame oil
  • 1 1/2 Tbsp grated fresh ginger
  • 3 cloves garlic minced
  • 1 English cucumber cut into 2-inch-long matchsticks
  • 2 Tbsp rice vinegar
  • 1 pd ground pork
  • 4 scallions cut into 1-inch pieces
  • 1/4 cup fresh cilantro leaves

Instructions

  1. Bring 4 quarts water to boil in large pot.  Off heat, add noodles and let sit until tender, about 5 minutes.  Drain and rinse under cold water; set aside.  Whisk soy sauce, 2 tablespoons oil, ginger, and garlic together in large bowl. Combine cucumber and vinegar in second bowl.

  2. Heat remaining 1 tablespoon oil in 12-inch nonstick skillet over medium-high heat until shimmering. Add pork and cook, breaking up meat with wooden spoon, until browned, about 7 minutes. Stir in scallions and 2 tablespoons soy sauce mixture and cook until scallions have softened, about 2 minutes.

  3. Add noodles to remaining soy sauce mixture and toss to combine. Divide noodles evenly among 4 bowls and top with pork, cucumber, and cilantro.

Recipe Notes

For best results, make sure to shake off all excess water from the noodles after rinsing them.

Italian Sausage with Lentils and Kale

Posted on

Italian Sausage with Lentils and Kale

Cooking sausages on the top of the lentil mixture infuses this one-skillet meal with rich, meaty flavor.

Author Cook's Country - Dec/Jan 2017

Ingredients

  • 2 tsp extra-virgin olive oil
  • 1 1/2 pds sweet Italian sausage
  • 2 shallots peeled, halved, and sliced thin
  • 3 cloves garlic minced
  • 10 oz kale stemmed and chopped
  • 3/4 cup chicken broth
  • salt & pepper
  • 1 15 oz can lentils rinsed
  • 3 Tbsp plain yogurt
  • 2 Tbsp whole-grain mustard
  • 1 Tbsp water

Instructions

  1. Adjust oven rack to middle position and heat oven to 375 degrees.  Heat oil in 12-inch skillet over medium-high heat until just smoking.  Add sausage and cook until browned all over, about five minutes; transfer to plate

  2. Reduce heat to medium, add shallots and garlic to now-empty skillet, and cook until vegetables start to brown, about 3 minutes.  Add kale, broth, 1/4 teaspoon salt and 1/4 teaspoon pepper; cover and cook until wilted, about 5 minutes

  3. Stir in lentils. Arranged browned sausage on top of lentil mixture and transfer skillet to over. Cook, uncovered, until sausage registers 160 degrees, about 12 minutes.  Whisk yogurt, mustard, and water together in bowl; drizzle over top. Serve.

Recipe Notes

For a spicier kick, use hot Italian sausage.

Game Time: The Thanksgiving Countdown

Posted on

Okay, guys. It’s Game Time.

We’re in the Thanksgiving Countdown. It’s time to get serious about how we’re going to play this.

The most important step is done. You’ve got your free-range, non-GMO turkey already ordered and you’ve already determined how you’re going to cook that luscious bird. (Right? If not, click here.)

Time to start figuring out the rest of the details—the side dishes and extra touches that make Thanksgiving such a unique, American holiday.

First up: STUFFING and GRAVY.

Some people don’t like stuffing or gravy. I mean, I don’t know any of those people personally, but I hear they exist. Mostly I feel sad for those (possibly imaginary?) people because they are seriously missing out. Stuffing and gravy are amazing for several reasons. One reason is that, when it comes to stuffing, it’s typically something you only have around the holidays, which makes it a little special. Another reason is that stuffing and gravy are incredibly versatile.

For example, there are an almost limitless number of ways to make stuffing. (Seriously, try Googling “stuffing recipe” and you get over 710 million results! My life goal is to try every one.) And while pretty much every kind of stuffing and gravy is guaranteed to be some variation on DELICIOUS, there are some tips and tricks you can try to make this year’s your best yet.


Gravy is blissfully simple to make—nearly as simple as opening a jar of the store-bought stuff! A general recipe is 1 tablespoon of fat (either butter or turkey fat from the pan) combined with 1 ½ tablespoons of flour to make a roux that can be added to one cup of liquid (stock, broth, wine, water, whatever sounds good to you).

Most important tip: Don’t run out of gravy. A good estimate is about 1/3 cup per person. So if you have eight people coming for dinner, you would multiply those base calculations by eight and end up with the proportions needed to provide each person 1/3 cup of gravy (4 tablespoons flour, 2 ½ tablespoons of fat, and 2 2/3 cups of liquid).

If doing that math and whipping up gravy during the last minute hustle and bustle of getting the meal on the table makes you nervous, we’ve got you covered. Try this Make-Ahead Mushroom Gravy from Fine Cooking, which can be made up to three days ahead.

A classic stuffing ingredient is “day old bread.” But the goal of this is actually not stale bread—what you really need for stuffing is dry bread. Instead of trying to let your bread go just-stale-enough, try lightly toasting your bread cubes in the oven before putting your stuffing together.

And, of course, keep an eye on temperature if you are choosing to cook your stuffing inside the bird. Before you deem your meal ready to be eaten, verify that the internal temperature of the stuffing has reached 165 degrees or higher. If your turkey is definitely done, but the stuffing isn’t quite there yet, you can remove the stuffing and continue cooking it outside the bird.

If you prefer to cook your stuffing separately from the get-go, it’ll be just as delicious. This is technically called “dressing,” but the only difference between “stuffing” and “dressing” is that dressing is cooked in a separate pan rather than within the turkey cavity. This “Simple is Best” Dressing  recipe from Epicurious is one of our favorites.

Some “Need to Know” Items as We Enter the Homestretch

Planning is key! The more you plan ahead, the smoother your holiday will go. Here are some tips to help you get that delicious dinner on the table.

  1. Calibrate your instant-read thermometer a few days before the Big Day. Insert your thermometer into a pot of boiling water. If it doesn’t read 212 degrees, adjust the nut located below the face of the thermometer until the reading is accurate.
  2. You know we love it. It’s one of the most important ingredients in so many dishes and a necessary part of our diet. Don’t be shy with that salt this Thanksgiving—it takes more salt than you think it does to properly season a dish.
  3. When planning your menu, keep the availability of oven space in mind. That turkey takes up a lot of room! Consider using recipes that call for different preparations, like one oven-based recipe, one stovetop, o
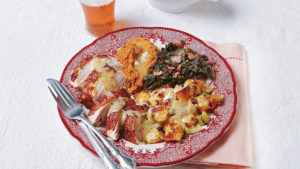
ne make-ahead, and one cold recipe, to maximize your cooking space and make sure everything is ready to eat at the same time.
  4. Once you have your menu planned, take the time to come up with a game plan. Map out the time needed for each dish, when you need to start prepping it, and when it goes into the oven (or onto the stovetop). This will help you maximize your efficiency and will be a quick and easy way to identify how people can help with meal prep when they offer.

Post-Thanksgiving Turkey Stock

When you think of Thanksgiving leftovers, you’re probably thinking of turkey sandwiches and mashed potatoes. If so, you may be forgetting one of the best leftovers from the meal–the turkey’s bones, neck, heart, and gizzard! These items can result in some delicious turkey stock. Use it to make soup right after Thanksgiving or freeze it in covered airtight containers for future use. Turkey stock can be used interchangeably with chicken stock in most recipes.

However you choose to celebrate this Thanksgiving, we wish you a wonderful, delicious, stress-free day!

Henrietta for Mayor! An Interview with a Chicken

Posted on

Thanks for joining us today. We’re talking with Henrietta, a non-GMO pastured chicken, who is running for Pasture Mayor and passionate about being the main course for your dinner.

Interviewer:  Thanks for taking a moment to invite me into your coop to talk about why everyday Americans should choose chicken for dinner. You are a passionate advocate for chickens everywhere as the go-to choice for any dinner, whether it’s a quick weeknight meal or a special occasion. Can you tell us why you feel so passionately about this?

Henrietta: Absolutely! Let’s start with the basics:  Chicken is good for you. It’s a lean meat, which means it’s low in fat, and it’s a great source of protein. Including lean protein in your meals is one the best ways to feel satiated, keeping your energy up and your hunger pangs down. Chicken is also a great source of amino acids, which are the building blocks of human bodies. And lucky for you, we’ve got a wide selection of chicken available for you to take home and enjoy!

Interviewer:  I can get chicken pretty much anywhere, though. Why should I buy chickens like you that were raised in this pasture rather than whatever I can get at a big-chain grocery store?

Henrietta:  First, we are non-GMO pastured hens. That means we were raised outdoors, free to roam around to our heart’s content, and never given any antibiotics, hormones, or feed made from genetically modified organisms. We’re all natural. Buying us means you will be getting chicken and nothing BUT chicken—before being sold, we’re not pumped full of salinated water, either.

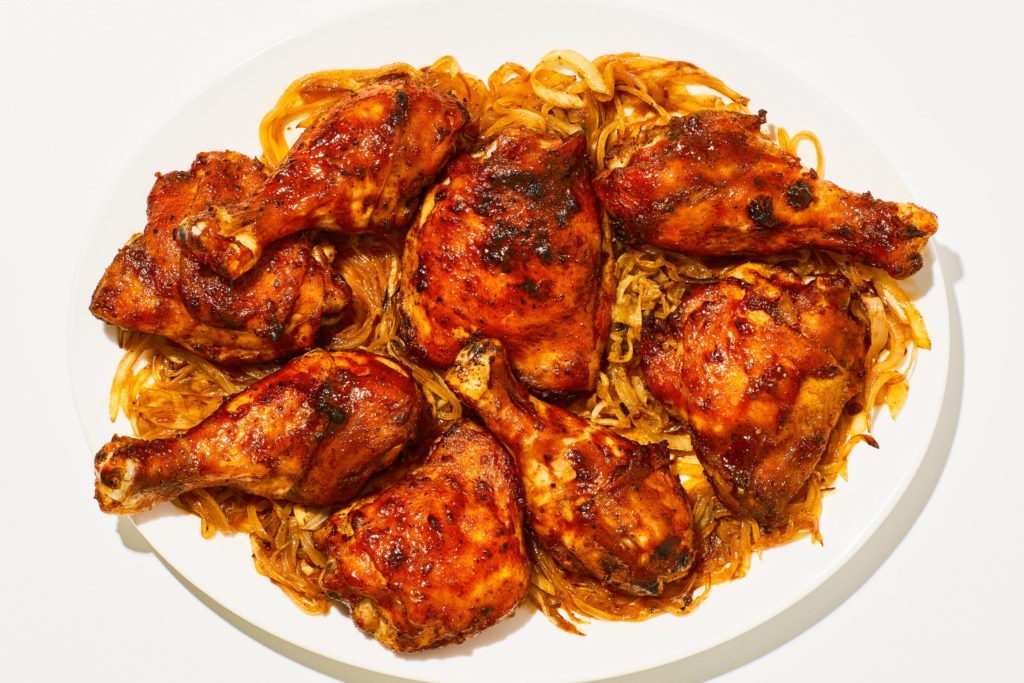
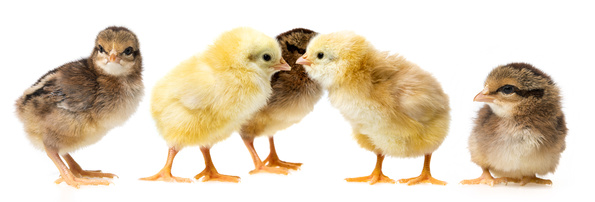
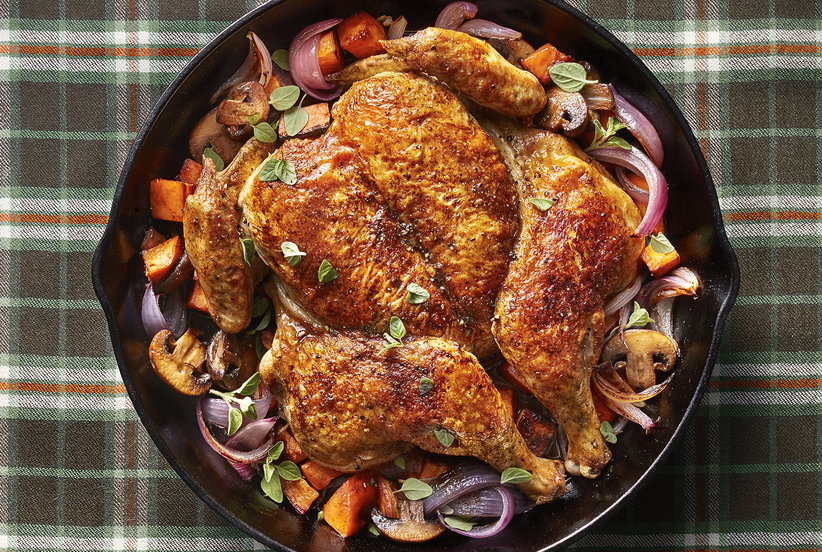
We’ve been ethically raised and that really comes out in our flavor. We are chicken at its purest. And chicken, as we know, is a quick and easy option for any meal. Great tasting, ethically raised, quick to prepare on a weeknight, and there are tons of different cuts available—you should be eating us every day!

Interviewer: Okay, that’s all amazing info, but why should I choose chicken for a special occasion when you just made the case that it’s such a great everyday food?

Henrietta: Everyone loves chicken—that’s why people eat it so often! But, in addition to chicken being a crowd pleasing menu choice, chicken is incredibly versatile. There are so many different ways to prepare it that you can get as fancy and complicated (chicken roulade, anyone?) or as minimalist as you want. And, if you’re cooking for a crowd, it’s the easiest thing in the world to simply roast two chickens instead of just one.

Interviewer: Roast chicken is pretty delicious. I’ve always loved stuffing mine with garlic, onions, and lemon, sprinkling some salt and pepper on the outside, and then cooking it slowly. It’s so moist and tender!

Henrietta: A classic method of preparation, my friend, and an excellent choice. If you want to experiment, though, in addition to stuffing some onions and lemon inside the bird, you could also try creating a paste of olive oil and generous amounts of spices (any ones you want! Get creative!) and then rubbing that into and underneath the skin.

Roast it until it’s nearly done and then blast it with heat for the last 20 minutes to really crisp up the skin. You’ll love it!

Interviewer:  Mmm, that does sound good. Can I ask you a personal question? I see it in recipes all the time, but I don’t understand the point—why do recipes tell me to pat the chicken dry

with paper towels? I mean, it’s kind of awkward, gently (they always specify gently!) patting a raw, naked bird inside and out. I usually just skip that step.

Henrietta [shocked]: What?! You skip that step?! No, no, my friend. Don’t feel weird about this. Pat that chicken until it’s as dry as you can get it. Removing excess moisture will help the skin crisp up into a delicious snack. If you’re skipping the patting step, I strongly suspect you may also be skipping the salting step. Is that true?

Interviewer:  Um…the salting step? No, no, I don’t skip that, I mean, I always use salt…

Henrietta [sternly]: Yes, but are you salting the chicken ahead of time? I don’t just mean using salt as a seasoning before you put it in the oven.

Interviewer:  Oh. Then, no. I guess I’m not salting. What do you mean?

Henrietta: Salting the chicken with kosher salt, both inside and out, allows the seasoning to really penetrate the meat. You should let the salted bird sit for at least an hour, but if you can salt it in advance and leave it in the fridge, uncovered, for up to a day, that’s even better.

Interviewer:  You know, sometimes I hear on the news that salt is bad. Should I really be adding salt to my chicken? Does it make my

chicken a less healthy choice if I’m adding salt to it?

Henrietta:  Not at all! Salt is an important part of our diet. Well, your diet, really. Human bodies use sodium to maintain fluid levels, transmit nerve impulses, and contract and relax muscle fibers, including the ones in your heart. If you want to give yourself an extra boost, consider using a natural, unrefined salt, such as one that is gray or pink, which contains all of its trace minerals. Unrefined salt is a whole food product and provides minerals we—well, you—need for proper cellular function.

Interviewer:  Henrietta, thanks for talking with us today. I feel like we barely scratched the surface with your bony, little chicken foot of all the advantages there are to making ethically raised, non-GMO chicken a centerpiece of our diets. Let’s talk again soon!

FALL!! SAUSAGE SAMPLER ASSORTMENT

Posted on

NEW FALL SPECIAL! 4-1 LB. of our 4 of our ”customer favorite sausages.” The Price on This COMBO can’t be beat! Taste them all and find your favorite!!

Let’s Talk Turkey

Posted on

What is it about turkey?

Just saying the word conjures Norman Rockwell-style images of smiling faces clustered around a table laden with a holiday feast that stars a beautifully roasted turkey.

I mean, obviously Norman forgot to paint the moments where the kids argue over who gets a drumstick and a heated debate breaks out over exactly how much butter should be added to the mashed potatoes (the answer is always MORE BUTTER), but whether it’s Norman Rockwell or Real Life, the anchor of both holiday scenes is the turkey.

So. It’s time to talk turkey. (Which is a funny pun because “to talk turkey” means to talk seriously and get down to business, but we are ACTUALLY going to be talking seriously about turkey! Yes, I realize jokes aren’t funny if you have explain them, but I’m not deleting it. Ahem. Moving on…)

Let’s start at the beginning:

How to Pick Your Turkey

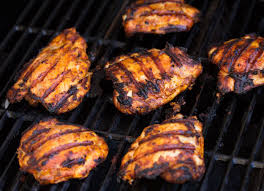
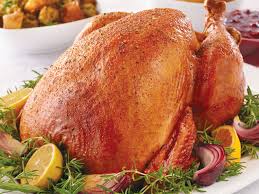
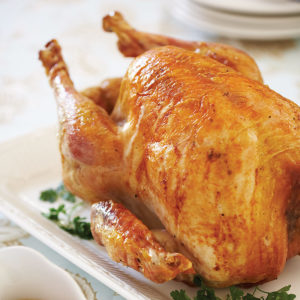
The different labels that can be applied to turkeys can be a bit confusing, so let’s start with some definitions:

Fresh – A turkey that hasn’t been chilled below 26 degrees Fahrenheit.

Frozen – A turkey that has been chilled to zero degrees Fahrenheit.

Deep-chilled – This is halfway between fresh and frozen, so chilled to anywhere between 0 and 26 degrees.

Organic – This refers to how the turkey was raised. Organic turkeys are raised without hormones or steroids and are processed without added preservatives.

Non-GMO – “Non-GMO” stands for “non-genetically modified organisms.” To genetically modify foods, scientists take some DNA from one organism, such as a bacterium, virus, animal, or plant, and combine them with the DNA of the modified plant they want to grow. A non-GMO turkey means the turkey was not fed genetically modified food.

Free-range – This means the turkey had access to the outdoors and was not kept solely within a cage.

Natural – A natural turkey has been minimally processed and hasn’t been modified in any way, like brining or injecting flavors.

Self-basting – This applies to many of the turkeys found at your local supermarket and means the turkey was injected with a brine or flavor solution during processing to keep them from drying out during cooking.

So, What’s the Best Option?

We believe that turkeys should be allowed to be, well, turkeys. Our turkeys are free-range (and non-GMO, which means they were never given genetically modified feed), so if our turkeys want to roam around the pasture, we let them. In fact, we encourage them!

We want our turkeys to be happy and allowing them the ability to exhibit natural turkey behaviors is a big part of that. Want to see video of exactly how free-range our turkeys are? Click here to see them hanging out, just doing their turkey thing, around the farm. And then click here to reserve your non-GMO free-range turkey in time for Thanksgiving.

(Not sure what size bird you’ll need for your meal? The rule of thumb is one pound per person.)

Okay, I’ve Got My Turkey…Now What?  

We are sharing our favorite roast turkey recipe this year. This is our go-to, never-fail option, and it’s foolproof as long as you start with a natural, antibiotic-free turkey that hasn’t been injected with any type of brine or flavor solution. Check out the Classic Roasted Turkey recipe from Food & Wine magazine.

Looking for an option other than the classic roasting method this year? Try spatchcocking! To spatchcock a bird means you have removed the backbone and flattened the turkey before cooking it skin side up. Because the turkey has been flattened to a consistent height, the bird cooks faster this way than if it were trussed and roasted.

Does the idea of removing the backbone feel a little intimidating? Feel intimidated no more! Bon Appetit has a great step by step video to guide you through the process. Just grab your kitchen shears and get started.


Other Tips to Keep in Mind:

  • If your turkey is frozen, make sure you allot plenty of time for the bird to completely thaw in the refrigerator (typically one day for every five pounds).
  • Be sure to gently pat your turkey dry with paper towels. This is an essential step for the turkey to develop crisp, delicious skin while it cooks.
  • Browning—sounds delicious! What is it? Rubbing the turkey with olive oil or clarified butter (“clarified” means the milk solids and water have been separated from the butterfat, making clarified butter pure butterfat and absolute liquid gold in the kitchen. Here’s a how-to) helps the turkey to brown evenly. Adding a little sprinkle of kosher salt will help crisp the skin even further.
  • Let that turkey rest! Once you take the turkey out of the oven, let it sit for about 20 minutes. This will allow the juices in the turkey to redistribute before you slice it, making each slice as moist and yummy as possible.
  • Most important: try to resist opening the oven door until the turkey is done cooking. We know it’s hard to wait (it smells so good!) but opening and closing the oven door will cause the turkey to cook unevenly, and with the Classic Roasted Turkey recipe, no basting is needed, so leave that oven door shut and just wait for the big meal reveal. 

Let’s Eat!

Okay, your bird is perfectly browned, that distinct, savory turkey smell is filling the house, and your stomach is rumbling like crazy. Time to eat! But first, you need to carve that bird.

There’s an art to carving a turkey, and fortunately, it’s one even the most knife-inept of us can master. The trick is to approach it systematically and break it down to make removing the meat from the bone a piece of cake (or pie, as the case may be).

  1. Place the turkey on a carving board while it rests. While the turkey rests, place your serving platter in the oven (make sure it is turned off!) to warm up so the meat will stay hot longer when served.
  2. Using a sharp slicing knife (we don’t recommend a serrated knife as this will tear the meat), place the knife at the point where the thigh meets the breast and slice down to cut through the joint.
  3. Cut through the leg joint to separate the thigh from the drumstick.
  4. Repeat on the other side.
  5. With your knife held at an angle, slice the meat off the thighs and (if desired) the drumsticks.
  6. Insert the tip of the knife between the ball joint of the wing and the socket and cut through the joint to remove each wing.
  7. Carve the breasts off each side of the rib cage with a long, thin cut right along the breastbone.
  8. Slice the breast meat on the bias (crosswise) in half-inch slices.
  9. Eat until you can eat no more.

Can you tell we are SO ready for the holiday season to start? We can’t wait to enjoy a beautifully roasted, humanely raised, delicious turkey with our family this Thanksgiving. Make sure to reserve your own non-GMO free-range turkey to make your Thanksgiving holiday that much more delicious this year.

Throw Out the Dried Stuff—Cook with Fresh Herbs!

Posted on

Fresh herbs can jazz up your cooking all year round, but the height of summer’s bounty— that would be right now!—is the perfect time to take advantage of the many flavorful herbs that are literally bursting from the ground.

Why Cook with Fresh Herbs?

Adding fresh herbs to your recipe is sure to result in a dish that’s absolutely brimming with flavor and complexity. Dried herbs not only lose flavor over time (dried herbs only stay fresh for about 1-3 years), but the heat used in the drying process may cause some of the herbs’ nutrients to be lost.

Fresh herbs are healthy!

They add tons of flavor without lots of extra calories, saturated fat, or sodium. (Try topping that baked potato with fresh parsley and chives instead of butter and salt—delicious AND nutritious!)

Herbs have also been used throughout history for medicinal purposes. Lemon verbena, for example, has traditionally be used for digestive orders, while tarragon (also known as dragon’s wort, which is a GREAT name) has seen a variety of uses, from treating bad breath and body odor (yes, really) to helping with insomnia.

How to Store Your Herbs

You just got home, fully stocked up on bunches of herbs from the grocery store or farmer’s market. Now what? Think of your herbs as tiny bouquets of flowers. Store them, stems down, in a few inches of water in the refrigerator. Then use a plastic produce bag as a little tent to help keep them hydrated. This will help your herbs last up to two weeks (if you haven’t eaten them by then!).

Another storage suggestion is to wrap herbs in a damp paper towel and store them in a ziplock bag along with the rest of the produce in your fridge. The goal is to keep your herbs hydrated and cool so they’ll be crisp and fresh for as long as possible. Try either (or both) storage methods and see what’s most convenient for you.

(Note:  These storage methods don’t apply to basil. Basil is happiest at around 55 degrees, which is warmer than your fridge. Store cut basil on the coolest section of your kitchen counter, away from the summer sun.)

If you still have some herbs left and you’re worried that you won’t use them before they go by, chop them up and freeze them with water in an ice cube tray. Store the frozen cubes in a plastic bag so you’ll have instant access to small portions of fresh herbs to add to recipes as needed.

Time to Use Those Herbs!

Fine Cooking has a great how-to on prepping and chopping herbs. Make sure the knife you use is nice and sharp. A dull knife will bruise the herbs rather than cutting through them cleanly, which can cause a lot of the herbs’ flavor to be lost on the cutting board rather than added to your meal.

Fresh-Herbs-1

And fresh herbs aren’t just for your food—try adding them to your drinks this summer, too! Add a handle of mint or basil to your water bottle for a little extra flavor as you keep hydrated. And check out this list of herb-infused cocktails—Lemon Verbena and Orange Blossom Fizz, anyone?!

Don’t be intimidated by thoughts of what herb “goes” with a certain food. Experiment! Add some tarragon to vinegar and use it on your salad tonight. Toss a handle of fresh basil into that jarred pasta sauce. Sprinkle some dill atop a bowl of cottage cheese. Throw some chives and oregano into your scrambled eggs tomorrow morning. The possibilities are endless and your palate will thank you.

Are you using a recipe that calls for dried herbs? If you want to replace the dried herbs with fresh ones, be sure to double the amount the recipe calls for. The drying process tends to concentrate the flavor of herbs, so if a recipe calls for half a teaspoon of dried oregano, replace it with a full teaspoon of fresh oregano.

Don’t Throw Out Those Stems!

You can get more use out of your herbs than just the leaves. Cilantro stems are nearly as flavorful as the leaves.

You can chop the stems up for your guacamole right along with the leaves, or you can use the stems for a completely different recipe, like this Cilantro-Ginger Mojo sauce, which only takes five minutes to make and is perfect served atop grilled meat.

The very bottoms of the cilantro stems may be a little more fibrous or soggy than is ideal, however, so we suggest removing and composting the bottom inch of the stems, leaving you with just the crispiest, most tender parts of the stems to work with.

Rosemary has a tough, woody stem, which means you probably won’t want to eat the stem. That doesn’t mean you can’t cook with it, though! Branches of rosemary can be used as skewers, and the oils from the rosemary stem will infuse the food. Need a suggestion?

Try making antipasto skewers (we like a cube of mozzarella, a little salami, an artichoke heart, a cherry tomato, and a nice briny olive to cap it off). For these, we would suggest leaving just an inch of two of the leaves at the top (this isn’t totally necessary if you have another use for those leaves, but it does look pretty!) to make it easier to get more delicate items like the artichoke hearts onto the stem. If you want try a classic, like grilled lamb on rosemary skewers, feel free to leave all those leaves right on the branch!

Another idea is to add a big stem of rosemary (or any herb) to your soup or stock as it simmers, which can impart a subtle complexity to the dish. And it won’t require any additional blending or pureeing later since you can just remove and discard the whole stem after you’re done cooking.

If you’ve never cooked with fresh herbs before, what are you waiting for?! And if you cook with fresh herbs but generally stick to the usual suspects (parsley, cilantro, thyme), take our Herb Challenge (we just made that up right now) and try to experiment with a new-to-you herb this summer. And be sure to let us know how it goes in the comments!

Happy cooking!


AWESOME AUGUST ASSORTMENT

Posted on

Cap Off Summer with this Incredible SPECIAL! 5 Lbs. of our famous Center Cut Berkshire Pork Chops, plus, 2 packs of Wagyu/Berkshire “Dogs,” 1 Lb. of our Great New Summer Sausage and 1 LB. of our Ready to Eat Pulled Pork. This COMBO can’t be beat!

13 TIPS TO BECOME THE ULTIMATE FARMERS MARKET STAR SHOPPER

Posted on


1. HUG Your Farmer

Try to be friendly with the vendors – a little bit goes a long way. Engage with them, ask questions.  If customers let farmers know what they are looking for, they will go out of their way to try to meet your expectations.  If you place your orders ahead or online, it will make sure that your favorites won’t be sold out and you won’t be disappointed.


2. FARMERS MARKETS are not just about PRODUCE anymore

You can find delectable meats and fish stands selling food that is better than what you can get at the supermarket or “big box” stores. Bring a cooler so you won’t have to rush home.


3. SMALL BILLS ARE KING!

4. TASTE THE PRODUCE

Yes, you should always ask to taste the produce, even if it is not on the “free sample” tray. This is standard practice. Nibble a couple of sugar snaps or taste a strawberry…just don’t make a MEAL out of it!


5. GO EARLY

Want to see what all the fuss is about? Show up early, right when the market opens. That’s when the product is at its most beautiful, before the products and the weather heat up.  This way you can peruse leisurely without the instagramming tourists.  Keep your eyes peeled for “chefs” making their daily runs-they may lead you to some hidden gems.


6. GO LATE

Sure, the produce is most perfect first thing, but right at the end before everyone is packing up is when you will get the best deals. No farmer wants to go home with unsold produce, so if you’re the “haggling” type, now is the time to make them an offer they can’t refuse-a half-price case of tomatoes for sauces, say. You may not find what you went for, but everyone leaves happy!


7. Never Show Up Without a TOTE


8. A little Hole in the Apple isn’t going to hurt!


9. Shop a WEEK AHEAD

Ask farmers when they expect to have certain items and produce. You can plan and make your order in advance… You can buy in bulk at the end of strawberry season, you can get a whole flat for freezing or jam-making, or that large batch of hamburger meat for your big Bar B Q.


10. Markets are for WALKING…not biking, skateboarding or scootering

Think of the great EXERCISE.


11. TRY SOMETHING NEW…why NOT??

It’s easy to become a creature of habit at the market. but try to push yourself to try something new each week. Don’t hesitate to ask the farmer what to do with items new to you.  Google is a great resource!!  It may not pan out, but at least you took a new adventure!!


12. BE PICKY…but not TOO picky

Everyone loves a perfect PLUM, but picking out 10 perfect plums, while handling at least 30 from a pile is a definite “no-no”. Not to mention, aggravating the folks waiting patiently in line behind you.


13. PLAN or NO PLAN???

Some folks never write a menu until they meet something great at the farmers market. Making a plan is like “naming a puppy, before you get it.”  Smell, taste, look, talk to your farmer  –  just use your senses and find out what speaks to you.


ASK A FARMER:  How can I be a better shopper??  Small family farmers wish you understood that local farms are not national companies that can ship things from everywhere and have the ability to pack things in huge manufacturing facilities and ship them in semi’s across the country.

They are working day and night, carefully growing and raising your food for you.  KNOW YOUR FARMER!!

Honeybees …More Than the Average, Garden Variety Insect

Posted on

To make a prairie it takes a clover and one bee,

One clover, and a bee.

And revery.

The revery alone will do,

If bees are few.

–Emily Dickinson


So, I hate to start things off by saying Emily Dickinson—nature lover, visionary, and poet extraordinaire—was wrong. But…well…Emily Dickinson was wrong. Like, completely wrong. Honeybees play an essential role in the production of both our prairies and our food—a role that a simple  “revery” (or reverie, while she was wrong about bees, Emily also couldn’t spell…) … will absolutely NOT replace the bees. And the honeybees are in trouble! Parasites, pesticides, and disease have all contributed to a significant drop in domesticated honeybee colonies in the United States over the past 15 years. Why should we care? Let’s talk about that!

Here’s Why We Care

Honeybees are essential to our country’s (and the world’s) agricultural production. Honeybees are responsible for one of out every three bites of our food, which means they pollinate, either directly or indirectly, approximately $15 billion worth of crops each year in the U.S. Globally, domesticated honeybees play a role in the production of approximately 70 percent of crops.

Bees carry pollen between the male and female parts of a plant, allowing the plant to produce seeds and fruit. A lack of bees means fewer crops being pollinated, as well as increased labor and productivity costs for beekeepers, costs which get passed on to farmers and then on to consumers.

That’s a major reason to care about the health of the honeybee population in the U.S. What are some other reasons?

Honeybees are the only insect that produces food for human. Honey has been around for thousands of years. The oldest honey discovered by archaeologists to this point is 5,500 years old. And you could still eat it! Not that we recommend that in this case. Honey has an indefinite shelf life, but eating honey from the tomb of an ancient noblewoman doesn’t exactly get our tastebuds revving.

Honey is also highly valued by holistic medical practitioners, due to its antibacterial and anti-inflammatory properties. Some people believe regularly consuming raw, local honey can help with allergies since you are ingesting small quantities of local pollen. And, of course, it’s a classic remedy for coughs. Who hasn’t reached for a cup of tea with honey to soothe a scratchy throat?

In 2007, beekeepers began reporting significantly higher than usual losses of their hives. The queen and her young bees were still alive and the colonies had plenty of food and honey stocked up, but the worker bees were suddenly dying or disappearing. Beekeepers couldn’t pinpoint the cause. Without worker bees, a hive cannot sustain itself and will eventually die. This is called Colony Collapse Disorder (CCD).

This sparked a lot of media attention toward honeybees and action plans on the part of various agricultural entities to alleviate the problem. The scientific causes of CCD have still not been figured out, but the number of colonies succumbing to CCD has been decreasing. Good news, right? Well, sort of. While a decrease in CCD losses is a win, colonies are still being lost to other factors. These factors generally fall into four categories: pathogens, poor nutrition, pesticides, and parasites, however,  the collapse of a colony may often involve multiple factors.

The United States Department of Agriculture is on the case, though! The Agricultural Research Service is studying honeybee health and formulating strategies to improve honeybee management that will hopefully help this bee population to thrive.

What About the Bees in My Garden?

The bees in your garden are most likely a different species, such as bumblebees, than the honeybees that play such an essential role in our food. That doesn’t mean they’re not important, though, and it doesn’t mean they couldn’t use a helping hand. Increasing the number and variety of pollinator-friendly flowers and herbs in your garden can make a significant difference for bees.

The goal is to have flowering plants that will bloom throughout the season so the bees have a regular source of nutrients and nectar to keep coming back to. Plants native to your region are best. Here’s a great resource for pollinator-friendly plants in your area. Adding a “bee bath,” which can be as simple as a plate of water, will also help attract bees, who use the water to regulate their temperature.

So what are some of the differences between honeybees and bumblebees?

Honeybees are very social and are part of a hive or colony, whose goal is to not just pollinate our crops but to produce honey. These worker bees seek out pollen sources and mine them for the production of honey back at the hive.

When worker bees find an amazing source of food, they go back to the hive and perform the “waggle dance,” where they wiggle around in a figure eight and waggle their bodies in the direction of the food source so the other worker bees know where to go. The length of time they do the waggle dance communicates how far away the food source is. It’s like recommending an awesome new restaurant to your friends, but by wagging your butt instead of texting them the restaurant name.

Bumblebees are a bit less social. Unlike honeybee hives that number thousands of bees, bumblebees live in nests with a few hundred other bees. Bumblebees are also more patient, methodically working through an area until everything is fully pollinated, and they have larger bodies that can carry heavier loads of pollen.

So while they aren’t used in agricultural production, they are still important pollinators and are particularly proficient at cross-pollination, which is important for fruit trees.

Bottom line:  Bees of all types are essential to our gardens, our fruit trees, this amazing ham, and the farms that feed us all.

Happy gardening, farming, and eating…and long live the queen (bee)!

SUPER SAUSAGE SPECTACULAR

Posted on

What could be easier than throwing these juicy, delicious sausages on the grill?? Bring the buns and your favorite toppings and VOILA, the 4th of July party has begun! We are topping this off with our “ready to eat” Pulled Pork.

Tips from Top Chefs!!!

Posted on

Every family has its “thing.” Some families are bikers. Some are bowlers. Some are gardeners. As for this family…we’re chefs. Every single one of us. That’s a lot of cooks in the kitchen!

When things get unruly, though, and everyone thinks we should make the potatoes their way, Tryg steps in, flaunts his snazzy degree from the Culinary Institute of America, and takes charge. (He’s so bossy.) But, like I said, we’re all chefs and we’ve all got our own go-to tips to make delicious meal after delicious meal. Today, in the spirit of spring and flowers and other good stuff, we’ve decided to share them with you (in no particular order, even though Tryg and his culinary degree thought he should go first). Bon appétit!

  1. Practice makes perfect. Cook, cook, and cook again. Trial and error is a great teacher!
  2. Recipes are just suggestions. Get creative!
  3. Unless you’re baking. Cooking is an art; baking is a science.
  4. But if you plan to follow a recipe, READ THE WHOLE THING IN ADVANCE. Every step. All the fine print. Getting halfway through and then finding out something was supposed to marinate for eight hours is never fun.
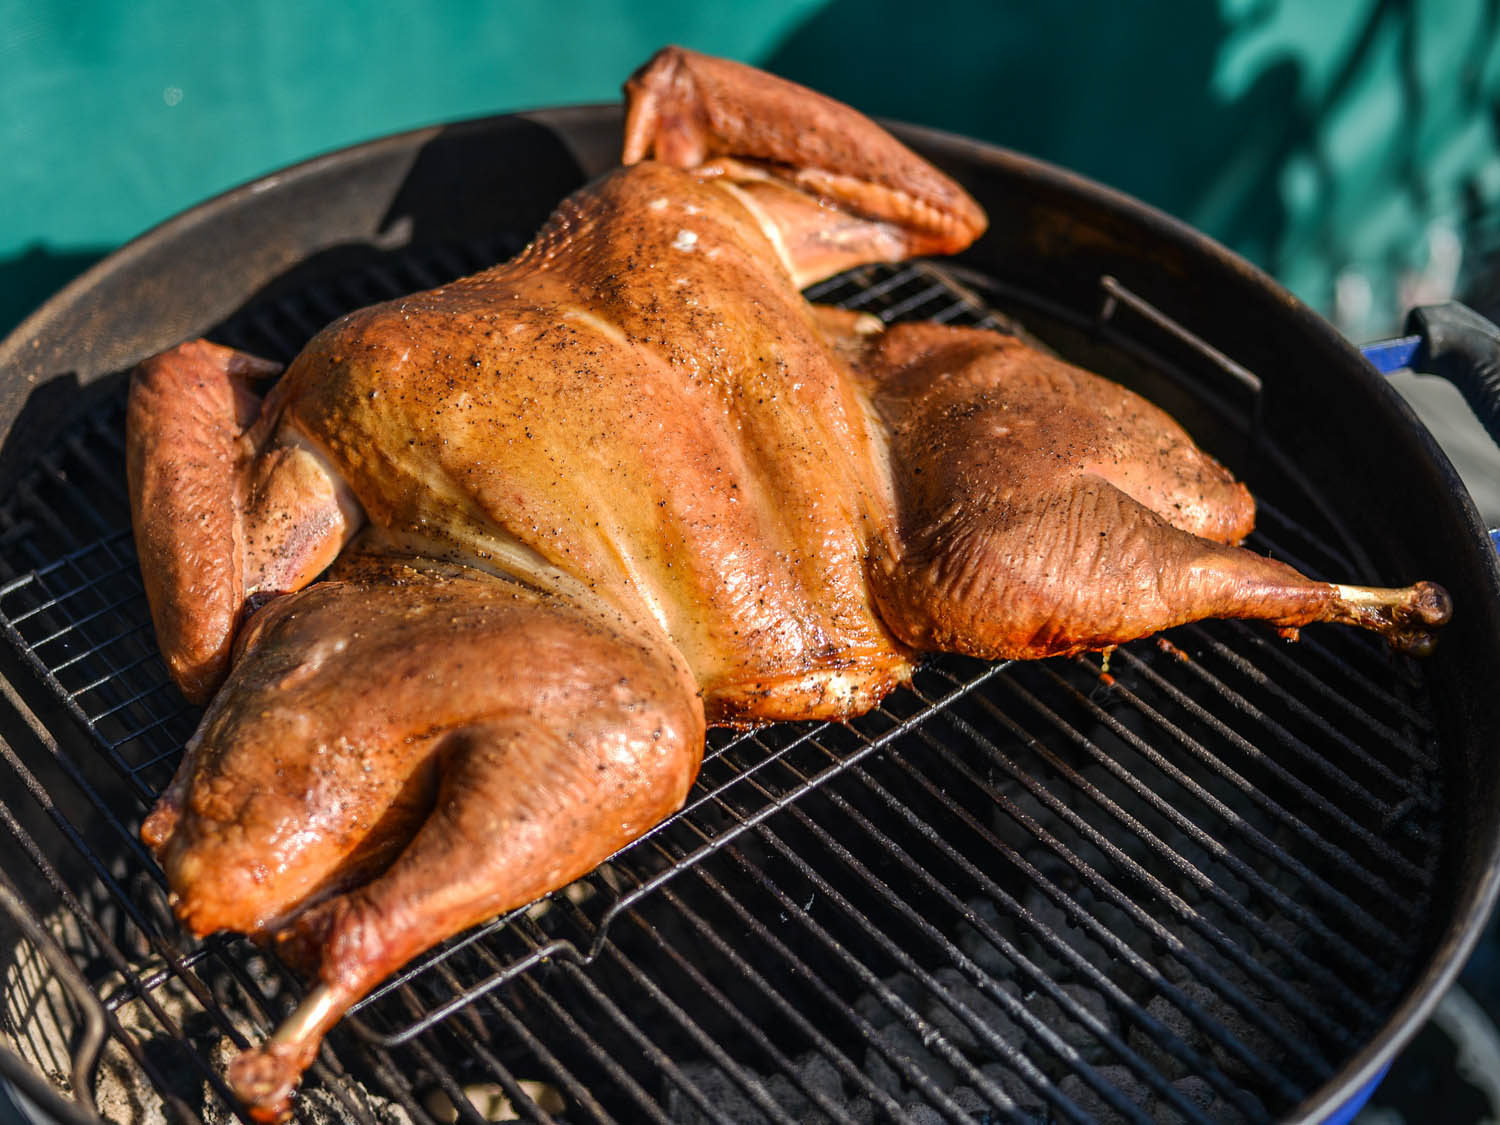
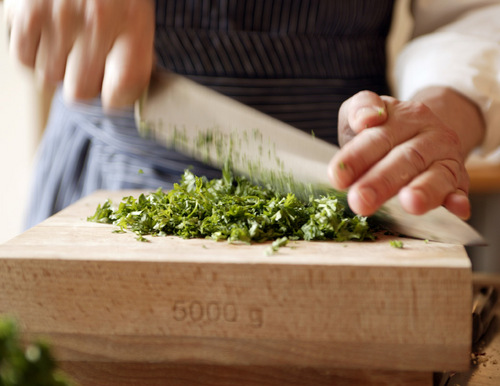
  5. Prep your ingredients in advance. Chop that onion, collect those spices, and have everything close to hand before you start actually cooking. Practicing mise en place, which is French for “putting everything in place,” will save you time and stress in the long run.
  6. Salt matters and all salts are not created equal.
  7. Let meat rest before you cut into it. If you cut into it too soon, all the juices that make the meat so delicious will escape onto the plate before you can enjoy them.
  8. Never cook with a wine you wouldn’t drink. (That means Just Say No to the stuff in the vinegar section of the grocery store!)
  9. Make what you like. Forget trying to cook to impress and make things you enjoy preparing and eating. After all, if you don’t want to eat it, why would anyone else?!
  10. The difference between a good cook and a great cook is more acid. If your meal needs a flavor boost, add a squeeze of lemon or splash of vinegar right at the end.
  11. Ditch the store bought salad dressings. Making your own is cheaper, a thousand times more delicious, and has endless flavor possibilities.
  12. Fresh herbs > dried herbs. Whenever possible, use fresh herbs in your cooking. Don’t want to buy an entire bunch of parsley if you only need a tablespoon? Buy the whole bunch and freeze the leftovers in ice cube trays. Then you’ll have fresh parsley on hand in small quantities for next time.
  13. Store your ingredients properly. Grocery stores have a vested interest in keeping food fresh for as long as possible. So think about how the ingredients were stored there, and then do that at home. For example, tomatoes should be kept at room temperature to preserve their flavor, and asparagus stalks should be stored upright with the ends in water.
  14. The only three tools you need: an instant read digital thermometer, a digital scale, and a sharp knife (and maybe a handheld knife sharpener to keep it in peak condition, so, okay, maybe you need FOUR things).
  15. Whenever you caramelize onions, make a double batch. This goes for rice and grains, too. Having these ingredients already prepped and in the fridge puts you on track for delicious weeknight meals in a hurry.
  16. When making pasta sauce, add a little of the water you used to cook your pasta to it. Pasta water is full of starch and will add extra body to your sauce.
  17. Dry your meat. You know those recipes where they tell you to pat your chicken dry with paper towels? It’s for a reason! In the case of a roast chicken, drying the chicken before putting it in the oven means the skin will crisp up better. In the case of other proteins, like a steak, patting it dry before placing it in a hot skillet will allow it to sear rather than steam.
  18. Save that fat! When you roast a chicken or fry up some bacon, be sure to save the leftover fat. It’s a quick and awesome variation on olive oil and an extra layer of flavor when you go to cook your next meal.
  19. Oil your veggies before seasoning. Tossing them with oil first means your seasoning will stick better.
  20. Save your veggie scraps and keep an eye out for sales on things like beef bones, so you can make homemade broth. Freeze your broth in an ice cube tray so you have small amounts readily available for recipes.
  21. The quality of your meat matters, both to your palate and the planet. Commit to eating meat that has been farmed humanely and sustainably. Your taste buds and Mother Nature will thank you!

These are our top tips—now let’s hear yours! We’re a family of self-taught chefs (except you, Tryg, we KNOW you have a degree) and we’re always interested in learning new tips and techniques. Share them in the comments below and in the meantime, happy cooking!

Spring Extravaganza: The HAM Season

Posted on

Welcome, Spring!

As we emerge from the bleak depths of winter, the arrival of spring brings with it budding flowers, greening grass, and the perfect occasion to eat one of our favorite meats…ham!

Ham is a great main course for entertaining and a classic choice for the Easter holiday.

Ham is also a versatile option in terms of preparation. You can glaze it, spiral slice it, smoke it, top it with mustard, or go full hog (sorry, couldn’t resist) and throw yourself an Easter pig roast. But more important than how you prepare or season your ham is the quality of the ham itself.

So let’s start with:  What is ham? I mean, we all know what ham is. Who hasn’t had a ham sandwich at least once in their life? But how does ham become HAM?

Well, at Pasture Prime, ham starts out as pork from humanely handled and processed pigs who are never given any antibiotics or hormones.

Ham comes from a cured leg cut of pork. The curing process can be either wet or dry and is a way to both preserve the meat and increase its flavor. Dry curing uses a special salt rub, while wet curing uses water as a lubricating agent. The two most 
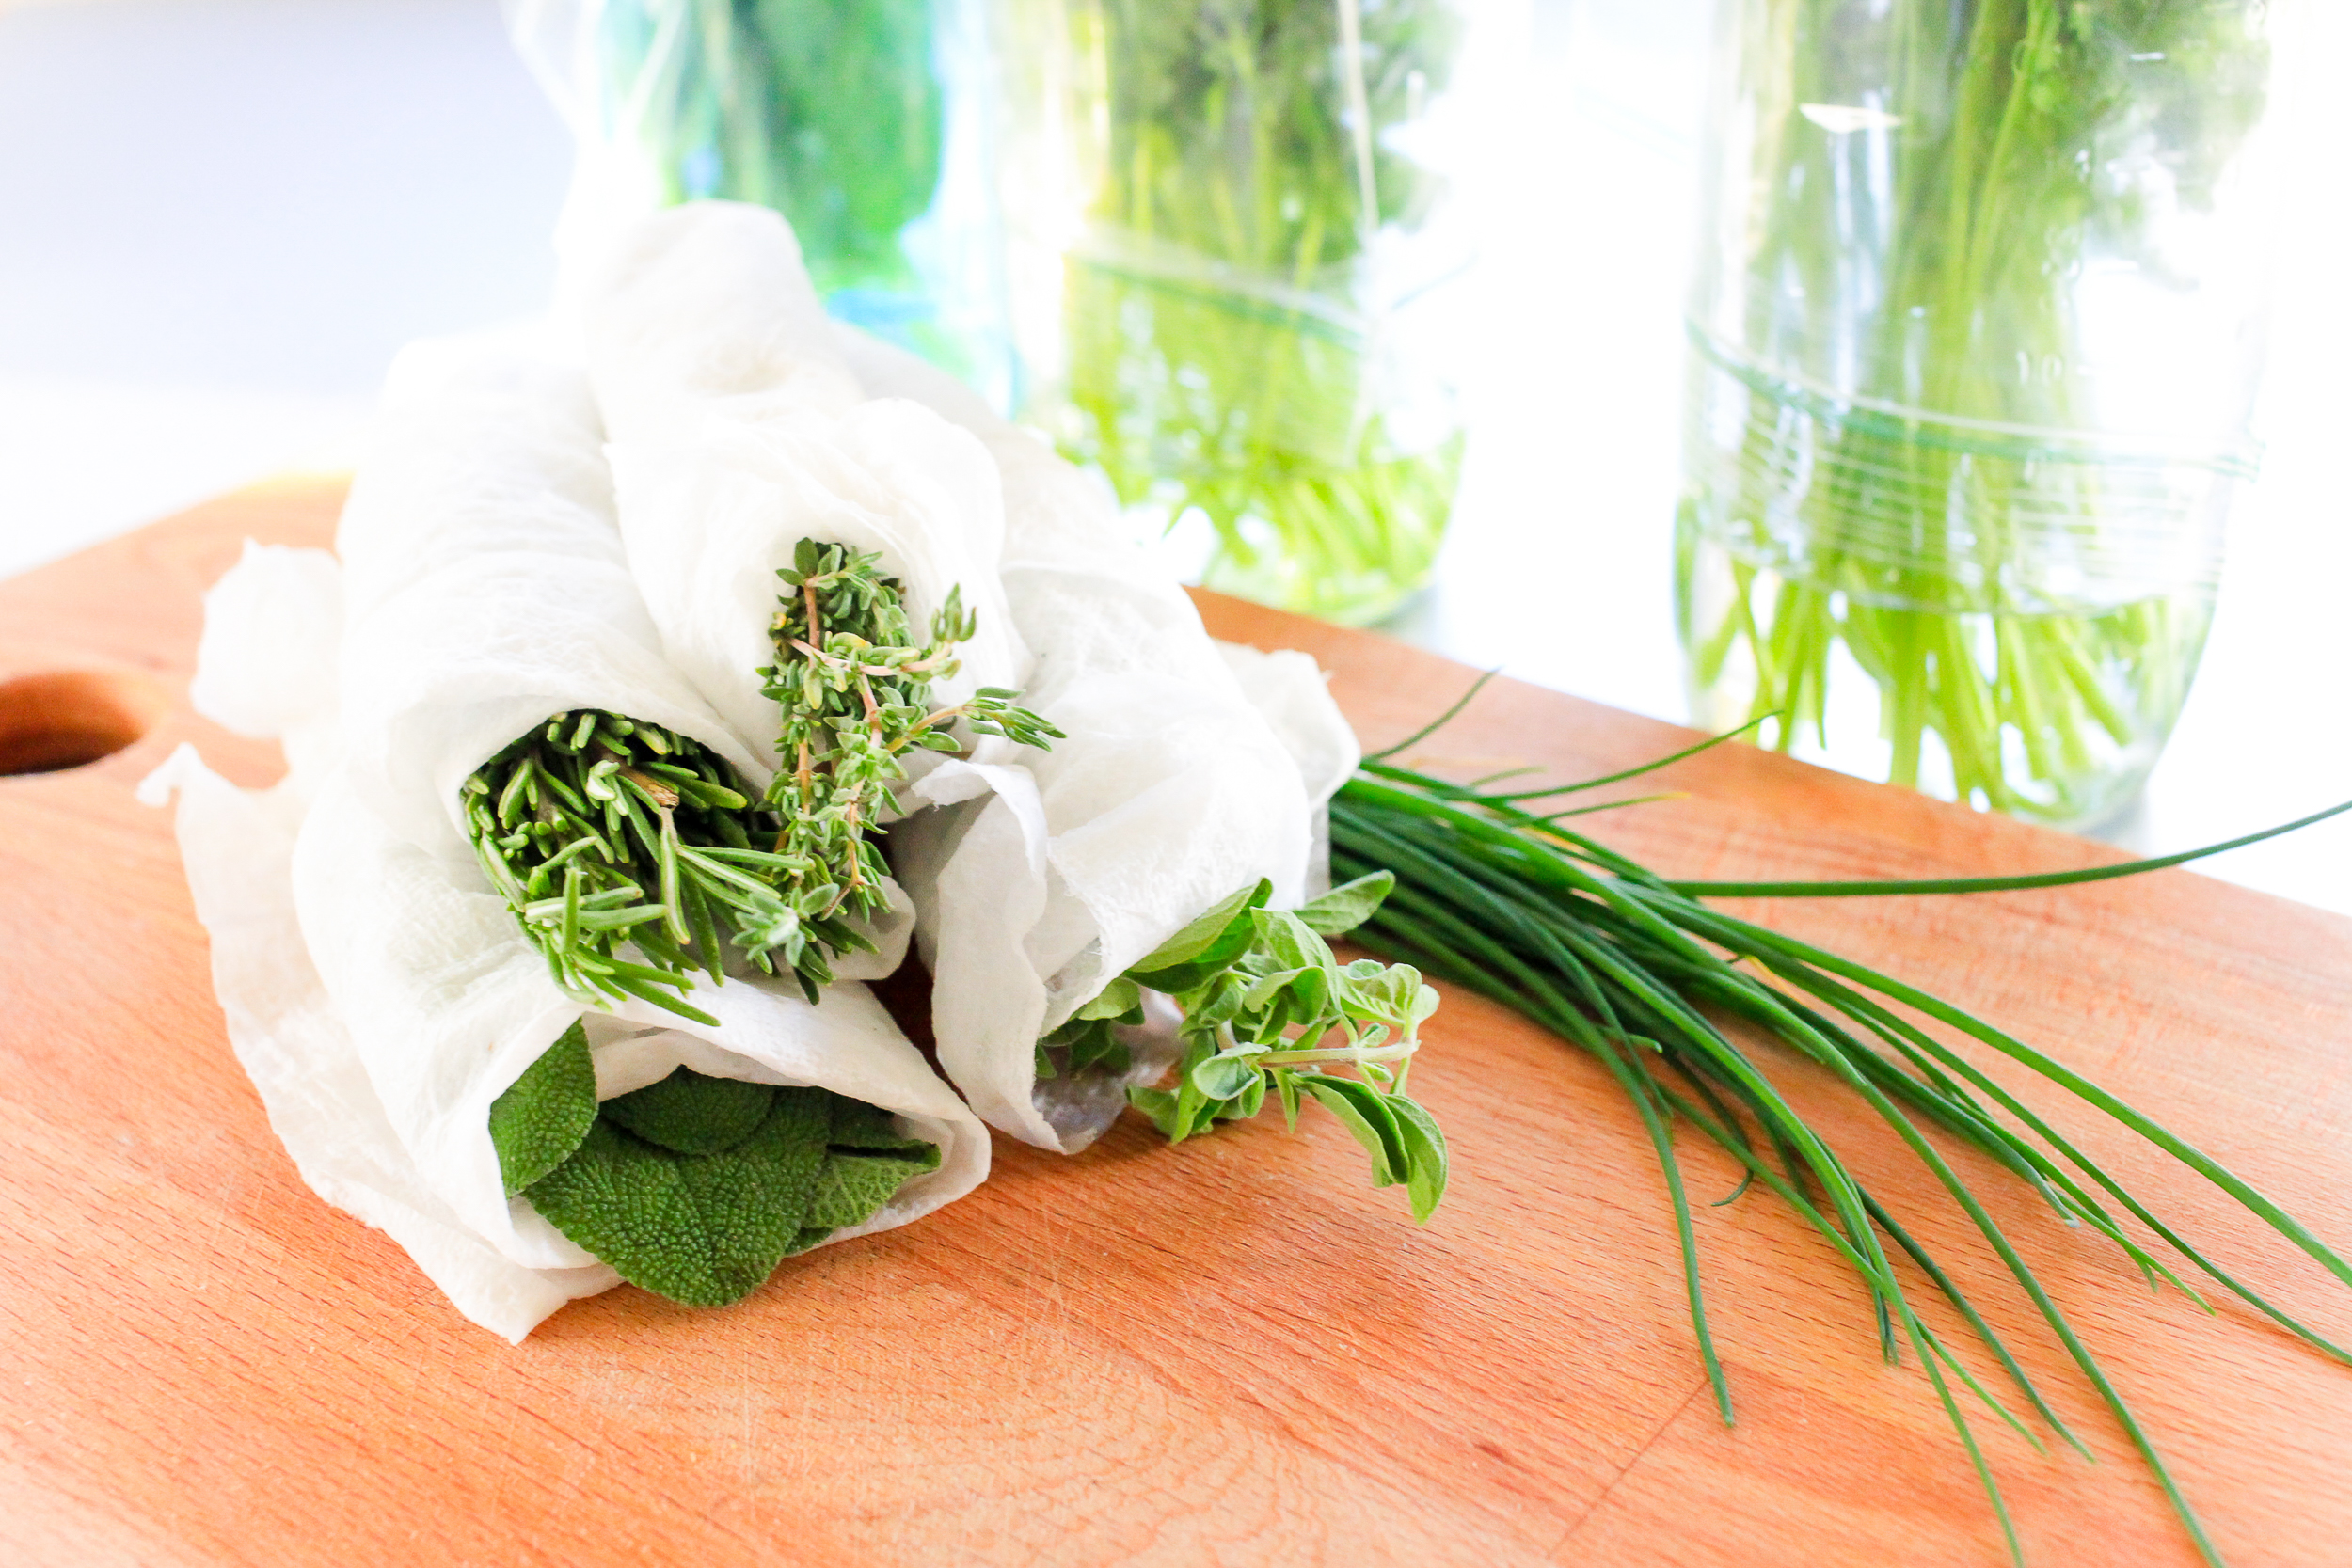
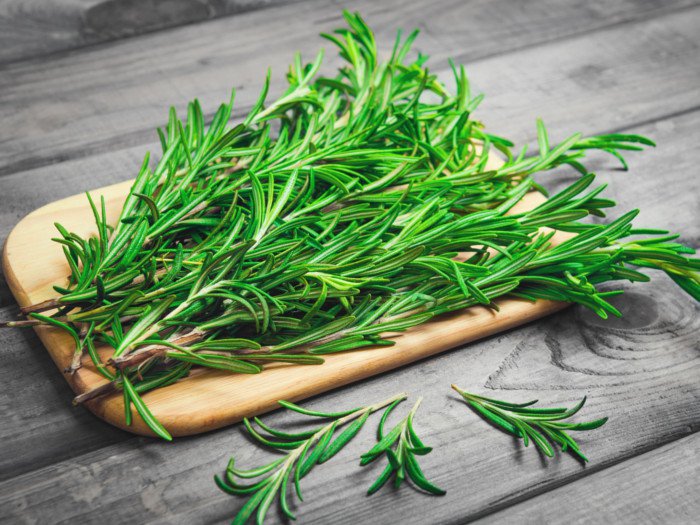
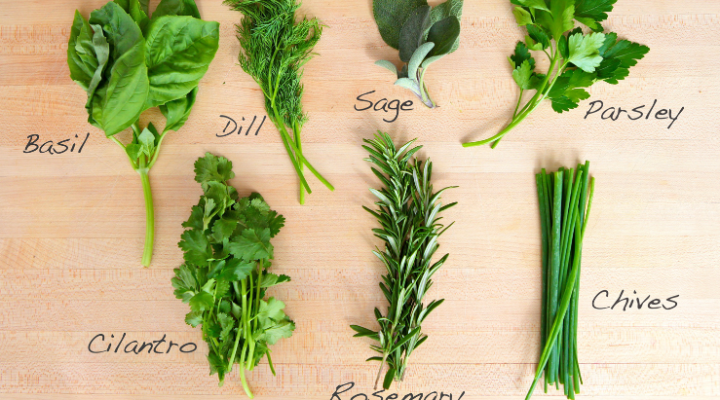
common wet curing mixtures are brine (salt and water) and sweet pickle (salt, water, and sugar). You can also add additional flavorings, such as rosemary or garlic, to the mix before either injecting the ham with the mixture or submerging it for up to a week.

The preservation process for ham can be so unique that many hams are “protected,” meaning that, depending on the jurisdiction, many hams cannot be labeled with the name of a particular style unless it actually came from that region (similar to how “real” champagne comes from the Champagne province of France).

Some examples include France’s Bayonne ham (slightly sweet with a chewy texture), the United Kingdom’s Wiltshire cure ham (originally a dry cure, since World War I, ham sourced from the UK has been wet cured by soaking in brine for 4-5 days), and Virginia’s Smithfield ham (ham that is finish-cured and aged for six months within the town borders of Smithfield, Virginia).

The preservation process for Black Forest ham can take up to three months, during which time the ham is salted and seasoned with garlic, coriander, pepper, and juniper berries, among other spices. The ham then cures for two weeks before the salt is removed and the ham ages for two more weeks. The ham is then cold-smoked.

Cold-smoking is done after meat has been fully cured and uses temperatures between 68 and 86 degrees Fahrenheit. Cold-smoking allows meat to take on that delicious, smoky flavor but still retain its moisture. The smokehouse can add additional flavor through the type of wood it uses for smoking. For Black Forest ham, smokehouses often use sawdust and fir or juniper brush. The ham will smoke for several weeks, turning nearly black on the outside, and then air-cures for an additional two weeks before it’s ready to be eaten.

Sound delicious?

We have it available! Check out this Berkshire Boneless Ham, smoked with Applewood, uncured (meaning no nitrates or nitrites were added through the use of a dry salt rub), and Black Forest style. We won’t say this ham will make the best ham sandwich you’ll ever eat in your life…but it will seriously make the best h

am sandwich you’ll ever eat in your life.  This sale price won’t last long, so grab yours while we’ve got them!

For Easter dinner, you can’t go wrong with a spiral sliced ham. Fully cooked, easy to prepare, and able to be served at any temperature, spiral sliced hams are a host’s dream. Our Spiral Sliced Berkshire Hams are Applewood smoked and honey glazed, which adds a hint of sweetness that you and your guests will love. The only downside to serving this ham for Easter is that it’s so good you might not have any leftovers to enjoy the next day! But, don’t worry, as long as your guests leave you the bone, you have the perfect starter to whip up a pot of Green Split Pea with Ham Bone Soup or make your own bone broth.

Happy Spring!

The Glories of Lamb

Posted on

Lamb is amazing. And if you can’t pinpoint the last time you enjoyed a plate of this tender, versatile, and healthy meat…well, then it’s been way too long.

Lucky for you, it’s lamb season! And we’re taking orders now to set you up with a supply of delicious meat that will last…well, probably not all the way until next year because it’s way too delicious for that, but with our locally-raised half and whole lamb options, you’ll be able to stock up on a selection of cuts (butchered to your specifications!), as well as ground lamb. (Lamb burgers, anyone?)

But first, let’s review some lamb Fast Facts:

  • You’re probably not eating enough of it. Americans eat less than one pound of lamb per person per year (0.7 pounds, to be exact). This is a travesty! New Zealanders, on the other hand, eat 57 pounds per person each year—they know that lamb is where it’s at!
  • One three ounce serving of lamb contains just under half of your daily vitamin B12 requirement. Oh, and that same serving will also provide you with vitamins B6, B3, B2, and B5. That’s a lot of essential vitamins in one serving, so “B” healthy and eat some lamb! (I’m sorry. I couldn’t resist. That was a terrible pun.)
  • Lamb is also a great source for Omega-3 fatty acids. These are the fats found in fish that may reduce inflammation and fight cancer and heart disease, among other awesome benefits. If you aren’t a huge fish fan, lamb is a great alternative: it has 50% of the omega-3s found in a serving of tuna.
  • Lamb is a red meat so it’s full of iron, protein, and can be served medium rare. It’s also one of the best sources available for conjugated linoleic acid (CLA), which has been shown to influence things like immune function, blood sugar regulation, and weight loss.
  • Lamb’s distinctive taste is courtesy of its fat and branched-chain fatty acids, a type of fatty acid that beef, for example, doesn’t possess. Lamb can also taste different depending on where it’s sourced from. Lambs from New Zealand, for example, eat grass for their whole life, which results in increased levels of branched chain fatty acids and a gamier taste. American lambs, on the other hand, eat grass but are often grain-finished, meaning they eat grain for the last 30 days of their life, which gives the meat a much milder flavor.

Wondering what, exactly, a whole lamb includes? We’ve got you covered with this list of possible cuts:

  • Lamb Shanks: Perfect for slow cooking, this cut comes from both the foreshanks and handshanks.
  • Shoulder Chop: Also known as arm and blade chops, shoulder chops require less cooking time than other cuts, making them a great weeknight meal option.
  • Rack of Lamb: Want to impressive someone? A platter adorned with a juicy, mouthwatering rack of lamb will have your guests asking where you went to culinary school. (But shhh, it’s actually really easy to prepare at home! Check out this video to learn how.)
  • Boneless Leg of Lamb: Typically weighing 7-8 pounds and one of the leanest lamb cuts, leg of lamb is extremely versatile. Roast it whole, trim it into smaller roasts, make kabobs…this cut has a LOT of possibilities.
  • Bone-In Leg of Lamb: The bone-in aspect gives this cut a little added flair that makes it perfect for a special occasion.
  • Sirloin Chop: These come from the leg, making them one of the larger chops. You can tell them apart from shoulder and loin chops due to their size and the small crosscut section of leg bone within the meat.
  • Loin Chop: Typically 3-4 ounces, these chops are lean, tender, and distinguished by the “T” shaped bone within the meat.
  • Ground Lamb: While ground lamb can replace ground beef in many recipes, you’ll also find many recipes that highlight the distinctive flavor of ground lamb.
  • Ribs: Lamb spareribs are a delicious alternative to pork in your favorite BBQ recipe.

Still not sure what you’ll do with either a half or whole lamb? We’ve got suggestions!

These Lamb Chops Sizzled with Garlic from Food & Wine are a go-to favorite of ours.

Lamb is a staple in Mediterranean diets and pairs well with herbs like mint, basil, oregano, thyme, and rosemary, as well as spices like cumin, coriander, turmeric, and curry. Get creative with your flavor pairings!

While Easter lamb with mint jelly is a classic holiday dish, lamb is so delicious, healthy, and versatile that you will want to make it a staple on your table all year long. Reserve your lamb here and then start googling recipes!

Pasta with Ground Pork & Asian Peanut Sauce

Posted on

Pasta with Ground Pork & Asian Peanut Sauce

Course Main Dish

Ingredients

  • 12 oz Rotini or Penne Pasta (use whole wheat or gluten free pasta as an option)
  • 1.5 TBSP Asian sesame oil
  • 5 medium scallions, thinly sliced
  • 2 TBSP fresh ginger, minced
  • 2 cloves garlic, minced
  • 1 pound Pasture Prime Ground Berkshire Pork
  • 1 TBSP Soy sauce
  • 2 TBSP rice vinegar
  • 1 TBSP sugar
  • 1 TBSP Asian chili paste or sambal oelek
  • 1/2 Cup crunchy peanut butter, preferably natural
  • 2/3 Cup chicken broth
  • 1 medium lime cut into quarters
  • 1/4 Cup fresh cilantro, chopped (optional)

Instructions

  1. Bring large pot of salted water to a boil
  2. Add pasta and cook according to package directions
  3. Heat a 12 inch heavy duty skillet over medium heat
  4. Add the oil, then the scallions
  5. Cook stirring, until softened, about 1 minute
  6. Add ginger & garlic and cook, stirring for 30 seconds
  7. Crumble in the pork, stirring until it loses its pink color, about 4-5 minutes.
  8. Stir in the Soy sauce, vinegar, chili paste and sugar and cook until just bubbling.
  9. Add the peanut butter and stir until incorporated
  10. Pour in the broth, stir and bring to a gentle simmer.
  11. Cook for 2 minutes.
  12. Reserve 1/2 cup pasta water
  13. Drain the pasta and return in to the pot
  14. Stir in the pork mixture.
  15. Thin sauce, if necessary with the remaining pasta water
  16. Divide among plates or bowls. Serve with lime wedge and top with cilantro. ENJOY!!

Bone Broth Basics

Posted on

It’s that time of year… and we’ve got major cravings for cold-weather comfort foods, like soups and stews.

What is it, exactly, that makes those comfort foods so…well, comforting? To answer that, we look right to the most essential ingredient of any soup or stew: bone broth.

What’s bone broth? Glad you asked! Bone broth is regular broth and stock’s significantly more amazing cousin.

Here’s a quick guide:

Broth – vegetables, aromatics (think garlic, onions, herbs, etc.) and meat simmered in water for a short period of time, usually less than two hours, then strained and seasoned. It’s light and flavorsome and stays completely liquid when chilled.

Stock – vegetables, aromatics, and bones simmered in water for about 4-6 hours then strained. When chilled, it’ll congeal into a wobbly, Jell-O-like state.

Bone broth – roasted collagen-heavy bones (usually marrow, knuckles, and feet bones), sometimes with a little meat left on them, simmered for a good long time—frequently over 24 hours—which extracts the minerals and nutrients from the bone marrow, then strained and seasoned. Like stock, bone broth will get wobbly in the fridge. Bone broth also frequently uses an acid, like apple cider vinegar, to the water to help leech every possible mineral out of the bones.

More About Bone Broth

Bone broth’s slow simmer preparation makes it higher in both flavor and nutrients than either stock or regular broth. Oftentimes, bone broth is the unsung hero that gives depth and character to your favorite soup, stew, or gravy. It’s a foundational ingredient in all fine cuisine and has been a staple in cuisine from pretty much every culture around the world for thousands of years.

And remember: it’s delicious and nutritious. Chicken soup may be hailed as the cure-all for whatever ails you, but it’s really the bone broth used in the soup that has all the healing power. So the next time you’re stuck in bed with a cold, sneezing, sniffling, and binge watching “Stranger Things,” try a soup made with a bone broth base or even a straight mug of bone broth to help get you back on your feet faster.

And you certainly don’t need to be sick to enjoy the health benefits of bone broth! Bone broth is both nutrient-dense and easily digestible. The collagen extracted from the bones help keep your skin clear and your hair and nails long and shiny. Bone broth is also an excellent source for several amino acids, such as proline, glycine, arginine, and glutamine, the amino acid that combines with glucose to create glucosamine, which promotes healthy joints.

So how, exactly, do you make bone broth?

  • Step 1: A good bone broth starts with good bones. We recommend these Wagyu beef knuckle bones as a great option for beef bone broth. Knuckle bones are particularly high in cartilage, and the collagen in cartilage will thicken the broth, increasing both body and flavor.You can choose your bones based on the flavor bone broth you’d like to enjoy—you can use anything from beef to rabbit to fish. Roasting the bones first is recommended. Roasting = caramelizing, which always makes for richer flavor. 
  • Step 2: Let your bones sit in water and vinegar for about an hour so the vinegar can start to leech the minerals from the bones.
  • Step 3: Vegetables and aromatics of your choice may be added and simmer 24-72 hours, occasionally skimming.  (Note:  At Pasture Prime, our bone broth doesn’t include anything added to alleviate any problems with allergies).
  • Step 4: Let the broth cool, strain it, add salt to taste, and enjoy! Broth can be stored in the fridge for 5-7 days or frozen for up to six months.

Looking for more exact instructions? Here’s one recipe you might be interested in. You can also make bone broth in your slow cooker. Check out this video to learn more.

Don’t have time to make your own but want to reap some of these benefits? Luckily, bone broth is having a bit of A Moment right now.

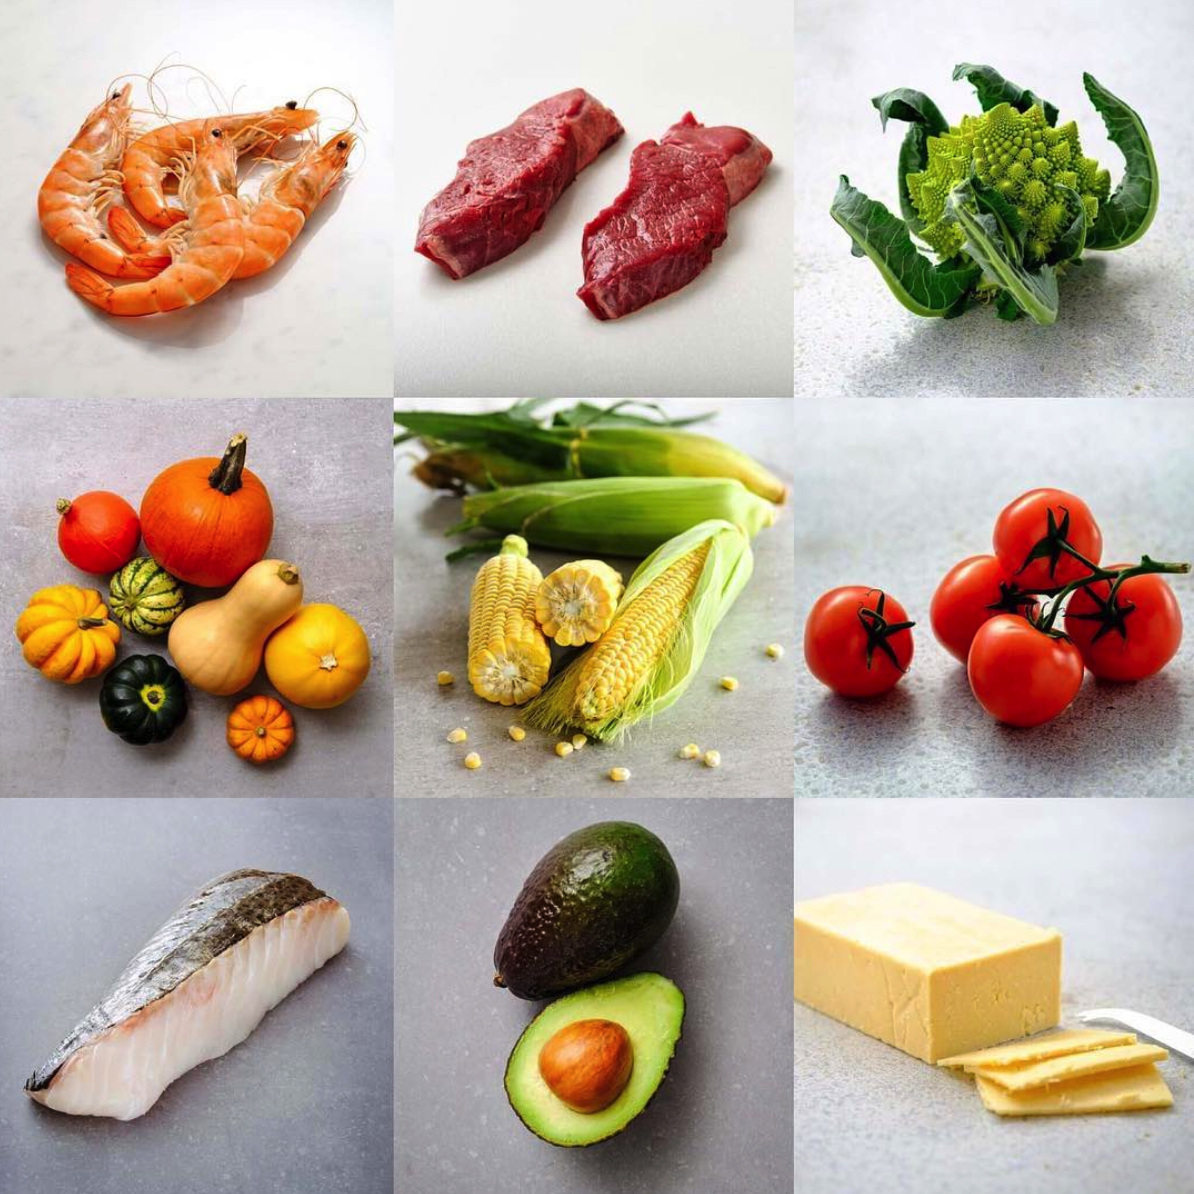
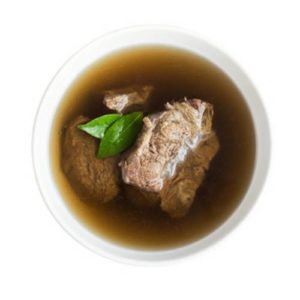
While bone broth has been a go-to ingredient for thousands of years, the popularity of the Paleo Diet, which emphasizes the consumption of foods that would have been available to humans during the Paleolithic era (things like grass-fed meat, fish, and fresh fruits and veggies), has helped propel bone broth into the spotlight to enjoy some long overdue praise and attention. We’ve stepped up to provide pre-made grass-fed bone broth to those of us who are a little short on time.

Here are some ways to enjoy your bone broth beyond drinking the delicious stuff straight:

  1. Use it as a base for gravy and sauce
  2. Simmer your vegetables in it
  3. Add it to mashed potatoes (use it in place of milk)
  4. Braise your meat in it to get them extra tender

…The possibilities are endless. Incorporating bone broth into your favorite recipes is an easy and delicious way to get some extra nutrients into your diet.

The final step before enjoying your bone broth is to add just a bit of salt. Curious about what kind of salt you should be using? Check out our recent blog post all about this topic here.

Holiday Meats: Ham, Turkey, Roast Beef and More!

Posted on

For many, if not most of us, our choice of holiday meat is determined by one thing:  Tradition.

Who among us is brave enough to defy years, or even decades, of family tradition by saying, “Eh…we’re not doing ham this Christmas.” Not us! But just because ham (or turkey or roast beef) is ALWAYS the main dish, doesn’t mean it has to be exactly the same every year. So while we might not be brave enough to surprise our families with a totally different holiday meat choice this year, we’ve got a whole bunch of ideas for you to add a little variety to your go-to holiday main course.

Pick the holiday meat you always eat (hey, that rhymes!) and enjoy these tips and suggestions that will help make THIS year’s version the best one yet. 

Your preferred meat is…HAM!

Ham is a host or hostess’s best friend. Why? Because it usually comes pre-cooked and can be served either hot OR cold. Ham is a great choice if you’re feeding a large crowd. The fact that it’s pre-cooked frees you up to focus on whipping up other parts of the meal or to take a break from the kitchen and just enjoy your guests’ company. Spiral cut hams make carving and serving, especially if you’re going buffet-style, even easier.

Want some added flair for your ham? Check out Betty Crocker’s 10 Ridiculously Easy Ham Glaze Recipes.  Or maybe that blueberry-chipotle ham glaze you try will even become a new tradition!

Or, if you really want to wow the crowd, how about our fabulous Black Forest Ham?  This is fully cooked, and is between a standard ham and prosciutto.  Can be easily sliced for an appetizer platter or warmed to impress even your “old school” relatives. This definitely moves you into the gourmet holiday category!

Your preferred meat is…TURKEY!

One of the trickiest parts of roasting a turkey is getting the dark meat (thighs, drumsticks) fully cooked without allowing the white meat, which cooks faster, to dry out. We’ve got an answer to this eternal dilemma:  Try  “spatchcocking” your turkey.

Spatchcocking is considered the latest, greatest method for serving your bird.  Check out this video from Mark Bittman on how to do it in 45 minutes! 

Do you lose the big presentation moment of walking into the dining room toting a huge, golden bird on a platter? Well, yes, but if you typically carve your bird in the kitchen and just bring a platter of turkey slices into the dining room, you may want to give this method a try. As this will give you the juiciest, crispiest skin, most perfectly cooked and shortest cooking time EVER!!!!

Your preferred meat is…ROAST BEEF!

What goes with roast beef? Um, what DOESN’T go with roast beef? Classic pairings are; rosemary, pepper, garlic rubs, horseradish and of course, don’t forget the mashed potatoes!

There is nothing more of a show stopper than a standing rib roast for your most special occasion.  Fortunately, there is nothing easier to prepare and healthier than our 100% grass-fed Wagyu Beef Standing Rib Roast.

Rub a basic herb rub into the meat, particularly into the spaces between the meat and the bones.  Cover with plastic wrap, and allow to sit at room temperature for 2 hours prior to cooking.

Preheat oven to 300 degrees.

Remove the plastic wrap and place the roast, fat side up, in a large roasting pan.  Insert a meat thermometer into the larger end, away from the bone (or use an instant read thermometer).  Cook your roast until the thermometer reads 115-120 degrees for rare, 125-130 degrees for medium.  Temperature is the key, not time.

Remove the roast from the oven, tent loosely with foil, and let rest for 20 minutes before carving and serving.  During this time, the meat will continue cooking (the internal temperature will increase about 10 degrees).

Your preferred meat is…PORK!

The rack of pork includes the loin and the rib bones, which makes it great for a party.  We’ve found that local chefs are using them on their special “tasting menus,” to impresses the most discriminating friends and family.  Check out our Berkshire Pork French Rack Roast!  And here are some tasty recipes to get you started:

Roasted Rack of Pork

Rack of Pork with an Herb-Mustard Crust

   also, Pork Tenderloin – our newest offering:

These approximate 1 pound beauties have the same calories as boneless, skinless chicken breasts and are “oh so juicy and flavorful.”  Bargain priced too!

Your preferred meat is…MEATLESS! (Wait, what?)

Hey, it happens. Maybe you go meatless on Christmas Eve for religious reasons. In that case, if fish is allowed, we love this Roasted Salmon with Dill, Capers, and Horseradish that will knock everyone’s socks off. And you can make up for your no-meat sacrifice on Christmas Day by wowing everyone again with your culinary versatility on NEW YEARS with an amazing ham/turkey/roast beef or tenderloin.

Whatever your choice of holiday meat this year, we hope it’s delicious and enjoyed in the company of family and good friends.

From our farm to your home, happy holidays from Pasture Prime!

Salt, Salt, or Salt?

Posted on

Are all salts created equal?

We love salt.

It’s one of those things every kitchen has.  We clean with it, cook with it, and even throw it over our shoulder.  But with the variety of salts available to us today, we get the question a lot:  Are all salts created equal?

The easy answer is yes…and no.  (Ok, maybe that’s not so easy).

Yes, all salts are chemically the same, because all salt is sodium chloride, or for you chemists NaCl.  But no, the texture, size, and procurement of salt crystals impacts how they taste, and how you should use them with food.

We’re here to help you distinguish between types and their best use. The easiest way to show you is to break the salts down into three main categories:  table salt, kosher salt, and sea salts.

TABLE SALT

Cow-Salt
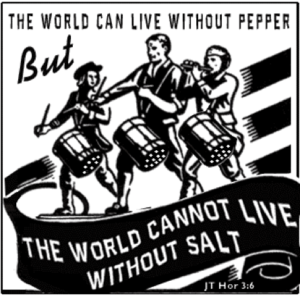
Table salt got its name from the place you find it most, on the table in cute little salt shakers (like the one shown here).  It’s procured by pumping water into underground deposits to dissolve the salt, bringing the brine to the surface, settling out the impurities and then evaporating the crystals out.  This process yields the tiny, regularly shaped grains (that are able to fit through your salt shaker!)

Unlike kosher or sea salts, most table salts contain additives.  “Iodized” table salt has, you guessed it, potassium iodide.  Additional additives include drying agents to prevent clumping.  Many chefs have reported a noticeable taste difference from these additives.

Table salt crystals being fine and evenly-shaped, makes them much more dense than other salts.  If you’re wondering why density matters, think about it this way:  with all else equal, a teaspoon of dense salt will make food saltier – because more crystals fit into the same teaspoon.  Thus, it is much easier to “over salt”.

The best use for “table salt” is where small crystals are more evenly distributed.  Baked goods, stocks, soups, and pasta cooking water are all tasty examples.  Also when salt is diluted in these liquids, there is no reason to use the higher priced specialty salts.

KOSHER SALT

Kosher salt crystals can come from the ground like table salt, or the sea (like…well…sea salt) and are produced without additives.  It is coarser than table salt because the crystals are not as fine or symmetrical.  This originally was meant to help with koshering the meat, but has become more widely adopted because the coarser crystals make food more flavorful.

Chefs love Kosher salt because the bigger crystals are easier to pick up between your fingers, ensuring control over those “pinches” of salt recipes call for.  The lower density of the crystals also makes the taste less intense and it’s more “pure” without those additives.

Kosher salt is very versatile and it dissolves fast so its flavor disperses quickly across food.  You can use it for just about anything before or during cooking, like seasoning or brining meats.

SEA SALT

Sea salt is the least processed of the bunch.  As you’d expect from the name, it’s harvested from the ocean or salty lakes by evaporating the water, leaving you with large, unique crystals.  These larger crystals offer a great burst of flavor for finished foods.  They’re typically flakier than Kosher salt, which creates an element of texture to your finished dishes.  Sprinkle just a bit on before eating for a pop of flavor.

Sea salts will diffuse into cooked foods and sauces just like Kosher or table salt, and the taste is almost indistinguishable, so you don’t need to use it while cooking.  It’s typically more expensive too, so savoring it with the final product will save you a little cash.Salt or Sugar

Another great thing to know about sea salts is they come in a variety “finishing” flavors to help you spice-up your completed dishes.

Smoked-infused varieties, like hickory or Applewood add an “off the grill” flavor to burgers or ribs, chicken or turkey, and even potatoes.  Use them sparingly as too much smoke can ruin the flavors your painstakingly worked into the dish before cooking.

Hawaiian sea salts are another option.  They’re often pink or brown because they’ve been mixed with a red volcanic clay which stick to the crystals.  They have a subtler flavor that make them great for pork or beef.

The list of finishing salts goes on and on; check out your local specialty food store to take a tour for yourself, and find one that will perfectly compliment your next masterpiece.

The Takeaway:

All salts are not equal. 

In a pinch, you can use them interchangeably, but our advice is to keep Kosher salt around for preparation and cooking, and sea salt/s around for the table (for finishing the dish off).

Salt-BannerSome important points we’ve discussed:

1. Table salt should not be used at the table. If you’re going to use it at all, use it only for dilution in pasta water, sauces, soups, baked goods, and the like.

2. Kosher salt should be your go-to for salt when prepping or cooking.  It has no additives, provides better flavor, and the larger crystals are easier to work with.

3. Sea salts (including finishing salts) should be your new table salt, but might change with the dish being served to add a crunchy burst of flavor to your creations.

You’re now an expert on salt.  Congratulations! 

Not sure what your first salt-expert recipe will be?  Try this one.

Bratwurst Sausage and Peppers – (or Italian or Hot Dogs)

Posted on

Bratwurst Sausage and Peppers - ( or Italian or Hot Dogs)

A juicy snack or quick and easy meal!
Course Main Dish
Prep Time 5 minutes
Cook Time 20 minutes
Total Time 25 minutes
Servings 4 people

Ingredients

  • 1 TBSP Olive or neutral oil
  • 8 Pasture Prime Bratwursts (or Italian Sausage) about 2 pounds
  • 1 Large Onion sliced thin
  • 1 Large Red Pepper seeded and cut into thin strips
  • 1 Large Yellow Pepper seeded and cut into thin strips (can substitute Green peppers)
  • 2 Cloves Garlic minced
  • 2 TBSP Tomato Paste
  • 1/2 Cup Dry white wine
  • 1/2 Cup Water
  • 1/2 Tsp Dried Oregano (or 1 TBSP Fresh)
  • 1 TBSP Balsamic Vinegar

Instructions

  1. Heat Oil over medium heat, until shimmering
  2. Prick Sausages in several spots and add to skillet
  3. Cook until browned on all sides, about 10 minutes.
  4. Transfer to large bowl to cool, and discard all fat but 1 TBSP. left in skillet
  5. Add Onion & Peppers and cook until beginning to wilt, about 5 minutes.
  6. Add Garlic and Tomato Paste and cook until fragrant, about 1 minute.
  7. Add wine, water, oregano, along with sausages which have been cut in half diagonally after cooling
  8. Add any accumulated juices, cover and cook through, about 5 minutes
  9. Add vinegar and cook uncovered until slightly thickened, 1-2 minutes
  10. Serve on hoagy rolls or over pasta or potatoes

Recipe Notes

This is great with any of Pasture Prime's "on farm" created meats; Italian Sausage or Gourmet Hot Dogs.