Happy Spring!
It’s time to turn our thoughts to April showers, May flowers, and the Easter holiday that is fast approaching!
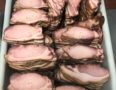
When it comes to Easter, we’ve usually focused on the delicious meals families often make to celebrate the holiday. Ham and lamb are both great choices for entertaining a crowd and we stand by that statement again this year! Unsure about the different cuts of lamb or how to prepare them? We talk about the many lamb options that lay before you right here. And we love ham for its flexibility—it can be served hot or cold and is always a crowd-pleaser. Check out our suggestions here! But there’s one Easter staple we haven’t talked about in those blog posts: the egg.
How, exactly, did eggs come to be so enmeshed in our Easter traditions?
The practice of decorating eggs has a long history. Ancient, in fact. Dating back to approximately 5,000 years ago, people viewed the egg as a symbol of death and rebirth. In civilizations where the ruler was viewed as a god (think ancient Egypt), painted ostrich eggs were included among the other artifacts laid in the ruler’s grave or tomb. These customs may have influenced how other cultures came to view the egg and incorporate it into their own beliefs. Early Christians embraced the egg’s symbolism and began to create Easter eggs. These early Easter eggs were stained red to represent Christ’s crucifixion, and the egg itself, with its history of representing death and rebirth, came to symbolize the empty tomb of Jesus and his resurrection. The tradition of the Easter egg gradually spread to Russia and Siberia, then to Europe and beyond.
The concept of Easter eggs continued to evolve, eventually becoming an intrinsic part of our culture.
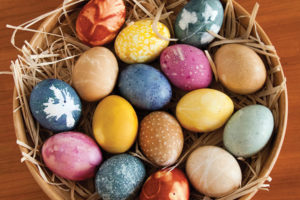
Ask anyone you meet what an Easter egg is, and even if their family traditions differ or they don’t celebrate the holiday, they’ll still know exactly what you’re talking about. But while stuffing plastic eggs with candy and small toys is fun, the REAL fun can be taking time to color eggs to use as decorations, hide for an egg hunt, or even eat as part of your Easter meal.

First things first: which eggs to use?
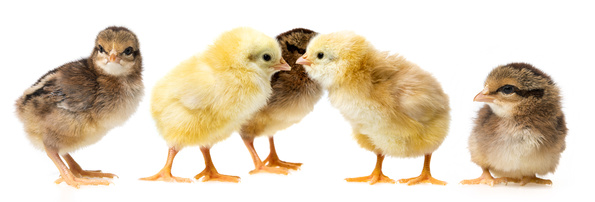
Historically, the classic choice is chicken eggs, though if you’re looking for a larger option, ducks produce eggs that can be around fifty percent larger than a jumbo chicken egg. People also often gravitate toward white eggs, thinking they are the best choice for decorating. But while there’s nothing wrong with starting with a blank canvas, brown eggs dye just as easily and the end results have a beautiful, earthy appearance with a nice depth of color. If you’d like to experiment with decorating brown eggs this year, you can stock up on farm fresh eggs for the holiday right here.
When it comes to decorating, you could go all out and create Pysanky eggs, which are elaborately decorated Ukrainian Easter eggs featuring symmetrical designs that have been drawn onto the eggs with the utmost precision. If you’re looking for a quick decorating job, this is not the option for you! But if you’d like to try your hand at creating some of these gorgeous eggs for yourself, Martha Stewart offers a handy beginner’s guide to Pysanky eggs.
For those of us looking for a slightly less time- and labor-intensive decorating option that still avoids those chemical-laden store-bought color tabs, natural dyes may be the way to go. This is also a great activity to do with kids—they’ll get a kick out of experimenting and learning which common kitchen items can be turned into egg dye. Even better, natural dyes can sometimes surprise you, which adds a layer of anticipation to the whole project. While you might think a red cabbage dye is going to result in a beautiful red egg, the actual end result will probably be closer to blue.
To create your own dyes, bring one quart of water and two tablespoons of white vinegar to a boil, add the ingredients for your chosen color, and let the pot simmer for thirty minutes. After the water has cooled, strain the dye and then let your eggs soak for a minimum of thirty minutes. The longer they soak, the richer the color!
Yellow
Ground turmeric—use three tablespoons. A pale yellow will appear after about thirty minutes of soaking.
Blue
Red (or purple) cabbage—use three cups of chopped cabbage. (To achieve a dark blue, the eggs will most likely need to soak overnight.)
Green
Soak the eggs in turmeric dye for thirty minutes and then in cabbage dye for five seconds.
Brown
Replace the water in the base recipe with one quart of strong black coffee and boil eggs for thirty minutes to create a gorgeous, rich brown.

This article from Good Housekeeping has more dye recipes, including silver, orange, and pink, as well as suggestions for vinegar substitutions, and we are “dyeing” to try them all! (Sorry, I’ll show myself out. Please don’t throw your eggs at me.)
We wish you a glorious start to the Spring season! And if you try your hand at Pysanky eggs, be sure to send us pictures!